
To register your ClickShare device (CX-series, C-series, and Bar Core/Pro) running firmware version 2.18 or higher to your XMS Cloud account, simply click the registration link (hyperlink) provided in the Configuration Wizard of your ClickShare device.
- Start registration
- Open the Configuration Wizard of your ClickShare device.
- On the SmartCare page, click the link:
Click here to register device.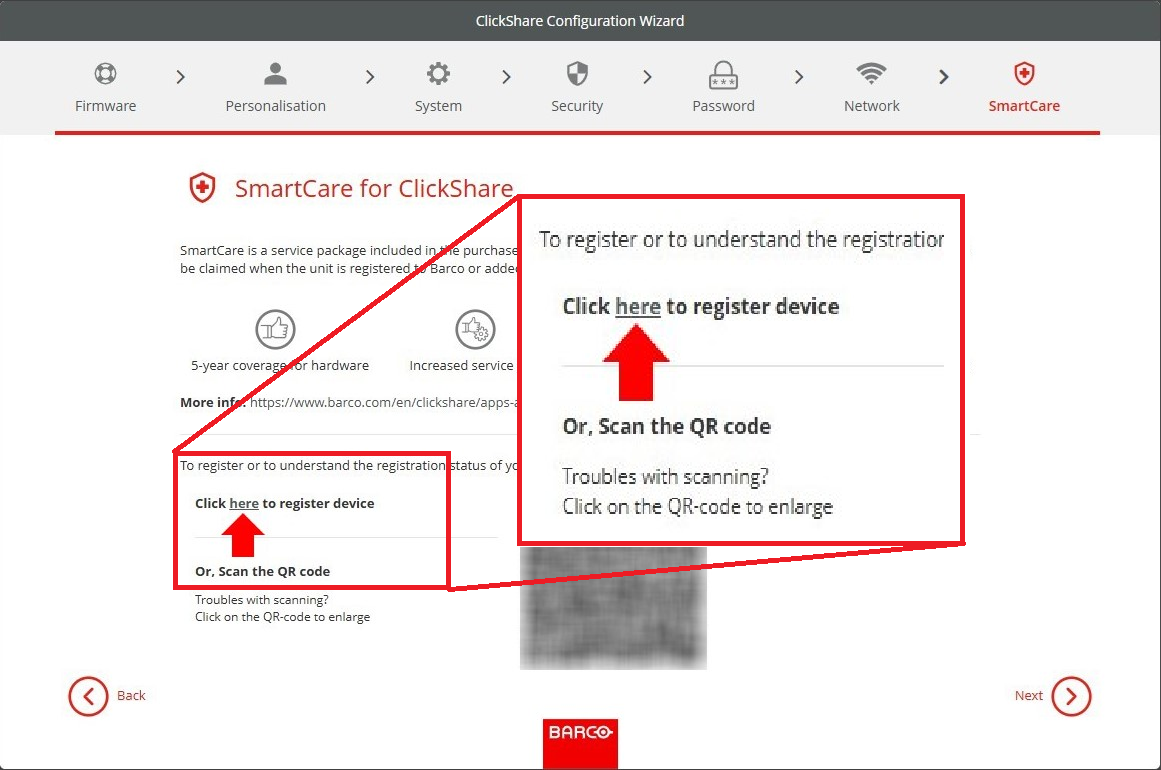
- Log into XMS Cloud
You'll be redirected to the XMS Cloud login page opened in your default web-browser. Log in with your XMS Cloud credentials.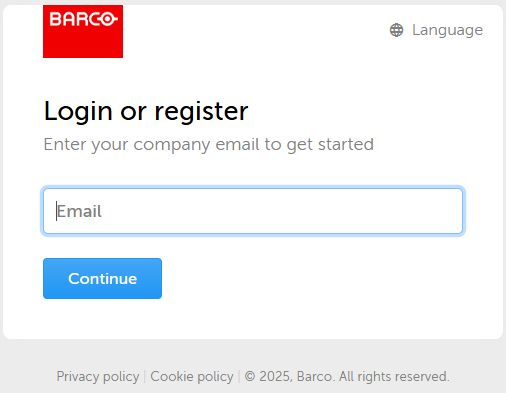
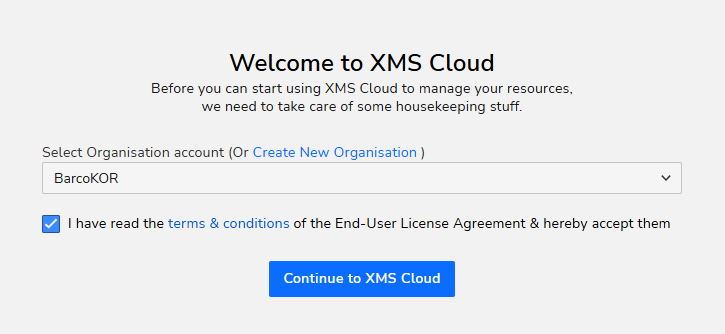
- If this is your first time logging in to XMS Cloud, you’ll be guided to create an account (how-to, see KB15250).
- Select the Organisation (aka location) in your XMS Cloud account where you want to register your ClickShare device, accept terms and conditions and click Continue to XMS Cloud.
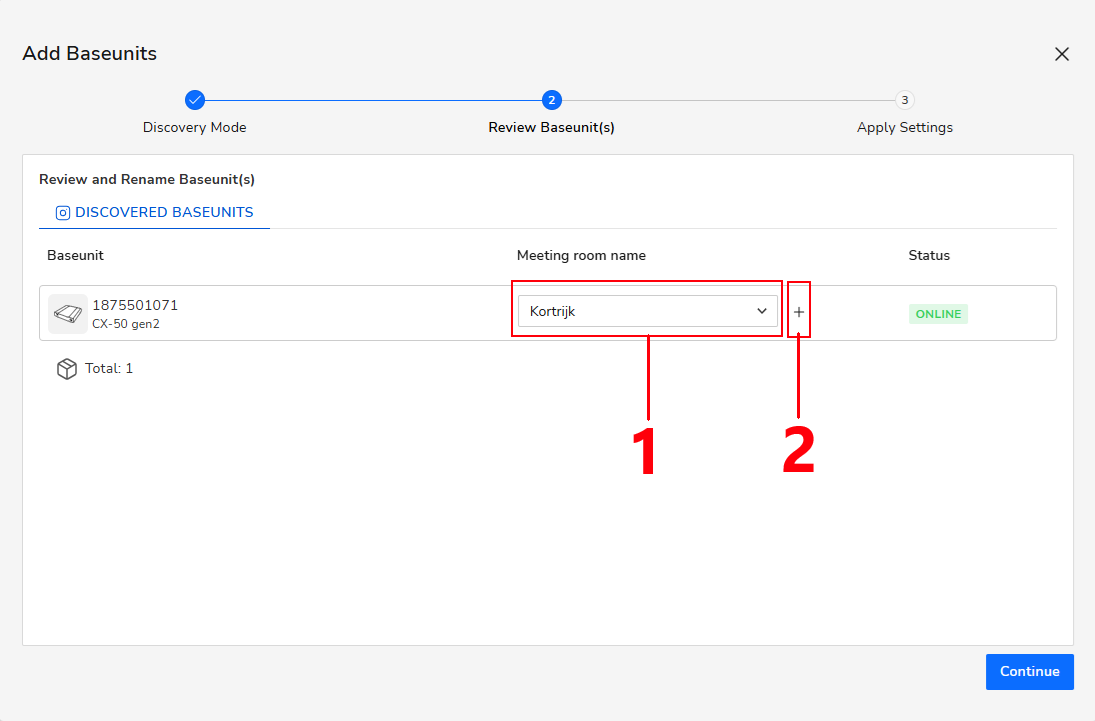
- Review device information and assign a meeting room
- XMS Cloud will automatically detect your ClickShare device for registration. Review the displayed information to confirm the correct device and organization are selected.
- Assign meeting room
- Select an existing one (#1) that was pre-configured in your XMS Cloud environment, or
- create a new Meeting Room (#2) during the registration process.
- When you're done, click Continue to proceed.
- Finish registration
- Configure the Location and Template settings.These settings are optional and can be skipped.
- Click Finish to complete the registration process.
Your ClickShare device has been successfully added to the selected organization in your XMS Cloud account.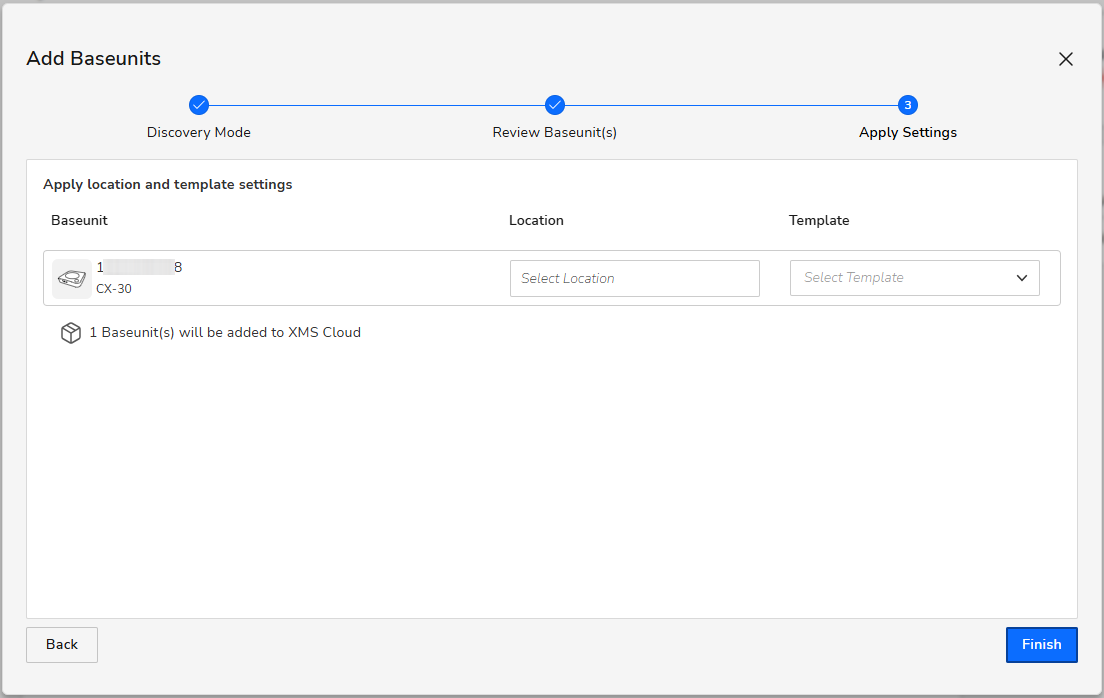
- Configure the Location and Template settings.
Registering using a QR code: If you want to register your ClickShare device by scanning its QR code, see KB15557.
Devices on older firmware: If your ClickShare device is running on firmware version 2.17 or lower, see KB2287 for the correct registration steps.
Organisation not visible in XMS Cloud: See KB15251 for information on how to create or reach out to your XMS Cloud administrator if you are still unable to create one.

