ClickShare spring release: fresh updates to keep hybrid meetings in full bloom
5 min read
Spring is all about a fresh start - longer days, fuller calendars, and a renewed urge to get things moving. In our Spring Release Webinar, we walked through the latest ClickShare updates – spotlighting a brand-new room system bundle, smart ways we’ve made installation easier, and favorite features from our ClickShare Conference and Present.
What's new?
- A new bundle in bloom: ClickShare Hub Pro + Huddly® C1™ bundle – a premium modular video conferencing room system for small-to-medium meeting rooms
- Installation made simpler: fewer cables, a standardized setup flow, and new accessories designed to keep rooms tidy and consistent
- Features in the spotlight: ClickShare Conference and Present updates that keep meetings flowing (including a smoother way to hand over content sharing)
Did you miss our webinar? Watch the recording!
Better meetings take a village (and a few great partners)
When it comes to hybrid meetings, the best technology is the kind that quietly helps people connect, without stealing the show. That’s why we work with industry leaders like Microsoft and Huddly – to help organizations create meeting spaces where everyone can participate fully, meetings start easily, and IT can deploy and manage devices with confidence.
Over the past two years, that work has included joining the Microsoft Device Ecosystem Platform (MDEP) program, launching the ClickShare Hub range on MDEP, and expanding our room system bundles certified for Microsoft Teams.
And this spring, that momentum continues with something new: ClickShare Hub Pro + Huddly® C1™.

A new bundle in bloom: ClickShare Hub Pro + Huddly® C1™
If spring is for fresh starts, this bundle is for smoother starts.
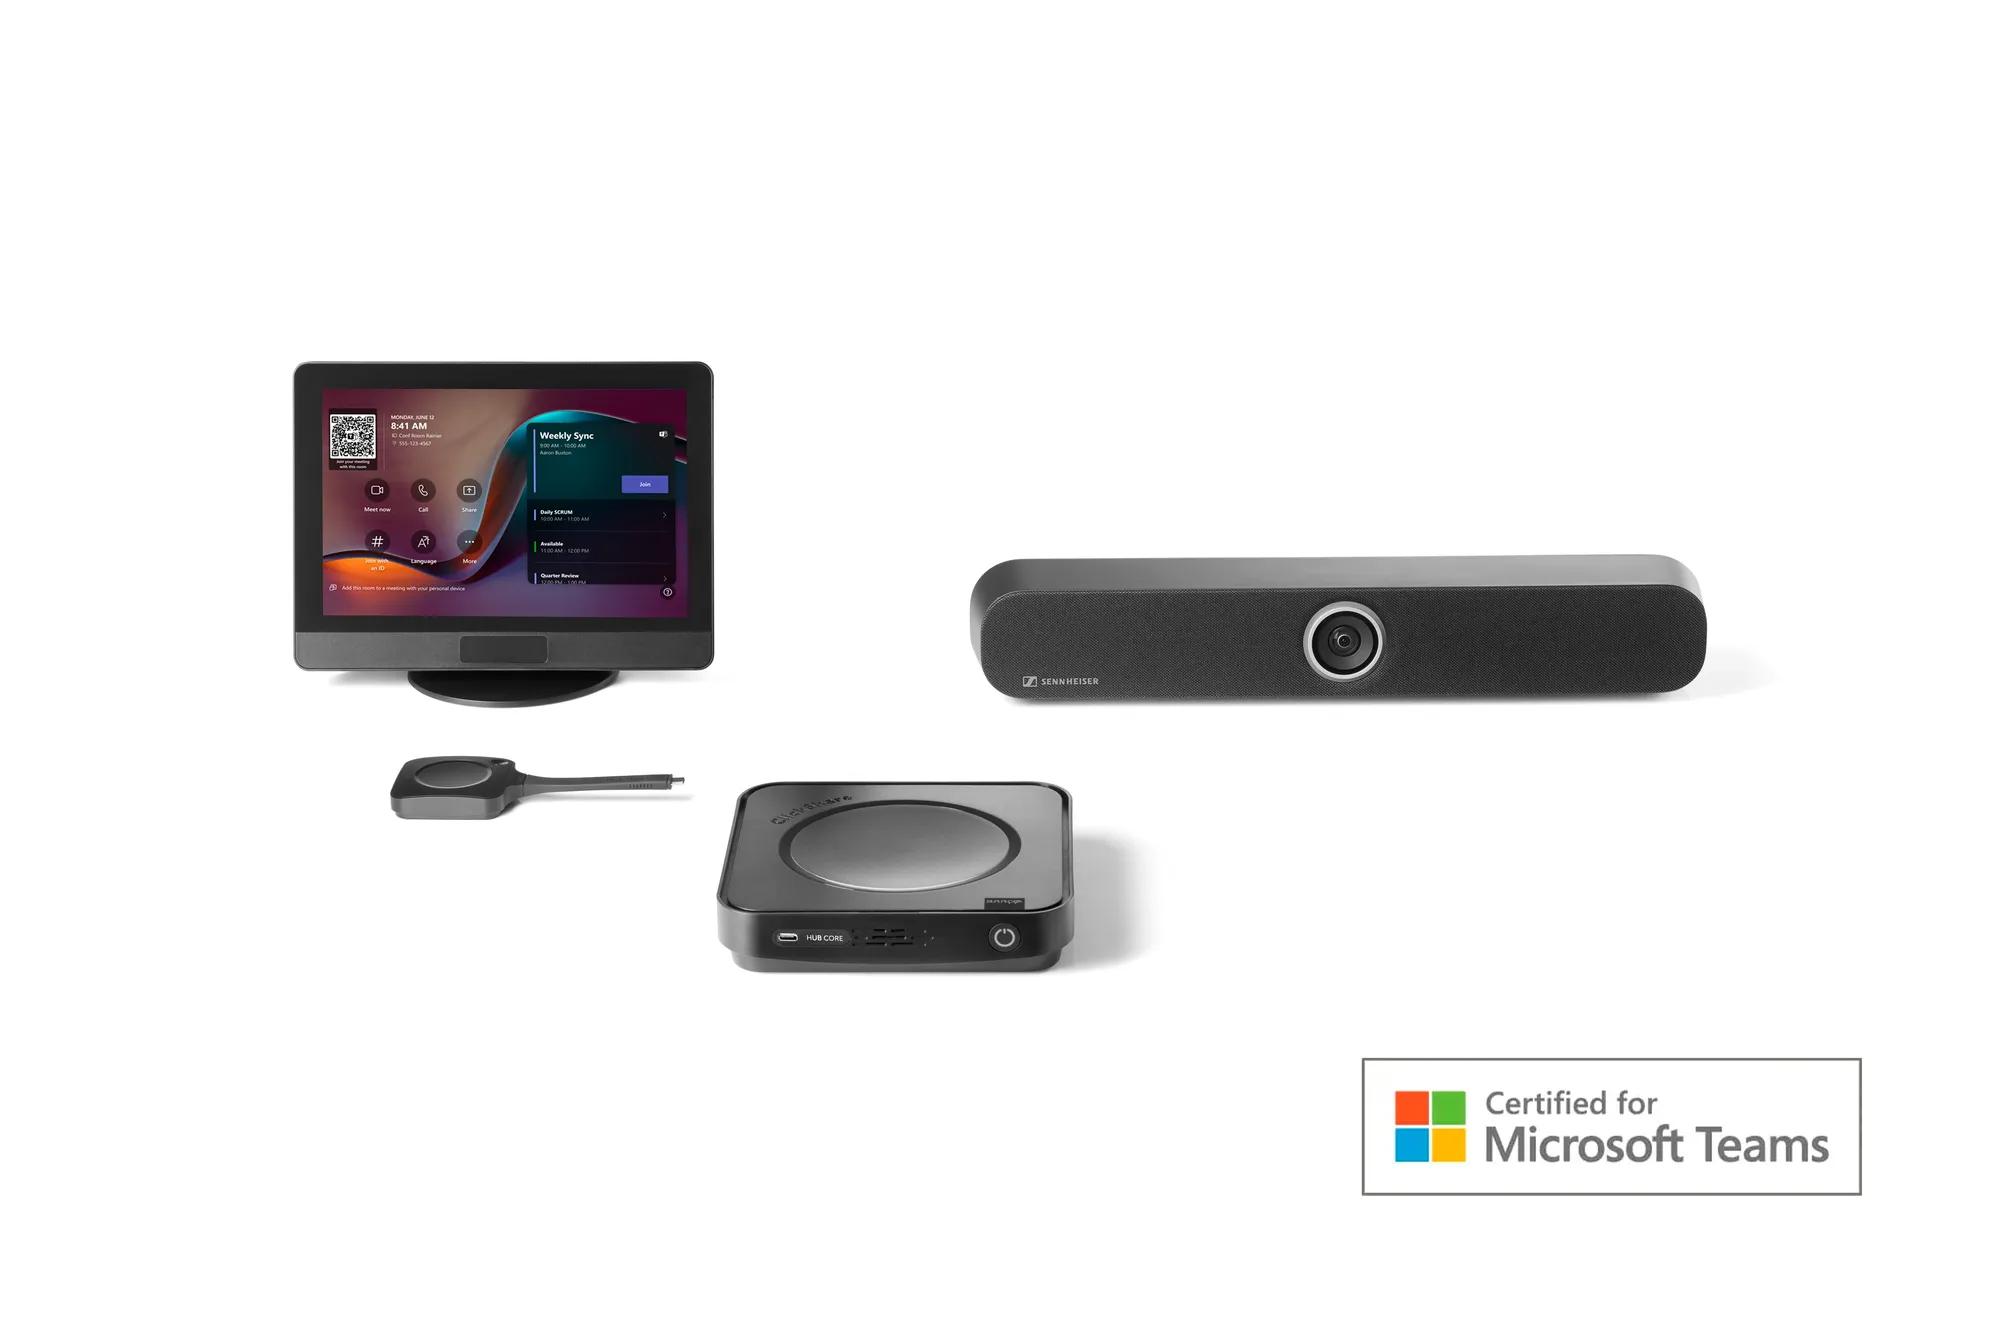
The ClickShare Hub Pro + Huddly® C1™ bundle is a premium modular wireless video conferencing room system for small-to-medium-sized meeting rooms, designed for a native Microsoft Teams experience.

ClickShare Hub: the end-user experience
ClickShare Hub is built around three meeting essentials: ease of use, flexibility, and guest-friendliness. That means people can start meetings confidently, share without stress, and keep remote participants truly visible – on standard, ultrawide, or dual displays.
How to join a meeting
Step 1: Tap the Control Panel to join the call


- Locate the ClickShare Control Panel. It's usually on the meeting room table.
- Find your meeting. On the home screen, look for your scheduled meeting in the calendar view.
- Tap “Join” to join your meeting.
- For an ad-hoc meeting: Start the call from your laptop and invite the room by selecting "Room Audio" in the pre-join screen.
Step 2: Plug in the Button to share content


- Plug in the Button and it will immediately connect you to the meeting room
- Simply press the Button
- Wirelessly share content in 4K from anywhere in the room
Step 3: Share your way
Sharing is possible with the Button, the Desktop App, or by using a USB-C cable
The next-gen ClickShare Button features USB-C DisplayPort™ mode enabling:
- All major operating systems (Windows, macOS, Linux, ChromeOS, iOS, etc.), even without software installed on your laptop, perfect for guests
- An extra layer of control. Content sharing only starts when you press the Button, not instantly – on purpose.
With the Desktop App, you benefit from advanced sharing options such as extended desktop or the possibility to share a dedicated app or window
Participants can share both people and content on a standard, ultrawide or dual display.

Installation made simpler: fewer cables, a standardized setup flow, and a tidy finish
If you’re the person responsible for getting ClickShare Hub up and running on-site, here’s the good news: the setup is designed to be refreshingly straightforward. Fewer moving parts. A consistent flow. And just enough “plug this here” to keep things satisfying.
In other words: let’s start unboxing.
What's in the box?
Inside you’ll find the ClickShare Hub components you need to get the room ready:
- The Base Unit (it looks slightly different depending on whether you have the Core or Pro version – but the installation flow is the same)
- Wall mount disc
- ClickShare Control Panel (plus the long USB-C cable labeled “source” and “display”)
- One or two next-gen ClickShare Buttons (depending on your Hub model)
- Power supply and cord

Once everything is out of the box, you’re ready for the easiest part: the six-step setup.
Scan the QR code on the Base Unit and link it to a room.
Plug the USB-C power cable into the power outlet of the Base Unit.
Connect the Ethernet cable to the RJ45 port.
Use the USB-C port for your peripherals – this is where the camera and audio connect.
Connect your display (or displays, if you’re installing the Pro version) through the HDMI port(s).
That’s it. All that’s left now is to boot up and enjoy the rare thrill of an installation that doesn’t require interpretive dance or a spare HDMI sacrifice.

Watch it in action
Features in the spotlight: ClickShare Conference & ClickShare Present
Long press Button: take over content sharing

A simple interaction that ensures a smooth handover between presenters, with fewer awkward pauses, and meetings that keep their rhythm.
- Short press -> side-by-side sharing*
Share your screen next to the current presenter for easy collaboration
- Long press -> take over
Take over the screen smoothly when it’s your turn to present
Good to know: this works in the ClickShare App, too!
*C-10, CX-30, CX-50 2nd gen
XMS Cloud: from reactive to proactive
Meeting rooms don’t always fail loudly – but they almost always fail at the worst possible time. The latest XMS Cloud updates are all about helping IT and AV teams spot issues early and keep rooms ready before the first “Hello, can you hear me?” hits the air.
This shift in a nutshell:
With XMS Cloud:
- XMS Cloud helps detect issues before anyone notices
- Instant alert – in-app and by email
- Intervene remotely in minutes, not hours
- Full firmware overview – bulk update in one click
- Shift from reactive fixes to scheduled maintenance
Health at a glance: the System Dashboard
Log in and instantly see the full state of your install base:
- System health score: Overall % health across all devices
- Firmware distribution: See which devices need an update
- Connected clients: ClickShare Button activity
- Overdue actions: Items requiring immediate attention
- Location usage: Meeting room activity
Proactive alerts: never miss what matters
XMS Cloud monitors your devices 24/7 and can alert you when key events occur – so you can act before the next meeting starts.
Set up notifications in 3 steps (yes, really)
- Open the Notifications panel: Click the bell icon in the top navigation bar of XMS Cloud.
- Access notification settings: Click the gear icon in the top-right corner of the Notifications panel.
- Choose your alert preferences: Enable In-App and/or Email per event category, then click Apply Changes.
What can trigger a notification?
Notifications are grouped by urgency, so you can tune signal vs. noise:
- Critical alerts (immediate action required): device heating up, device fan stopped, display disconnected
- Warnings (may need your attention): button pairing failed, firmware update failed, calendar integration needs action
- Informational (no action needed): firmware update success, Button pairing success, “What’s new,” news, surveys
System notification tuning (3 steps)
Open the Events Configuration page: Click the gear icon --> Events Configuration.
Access event settings: Click the gear icon in the top-right corner of the Notifications panel.
Choose your event preferences: Configure Health factor and Auto Dismiss setting
How to update your devices?
ClickShare consists of different components: Base Units, Buttons, Apps, and the XMS Cloud management platform. Make sure each component is updated to guarantee the best experience.
Base Unit firmware can be installed via auto-update, manually via the ClickShare Configurator, or centrally managed through XMS Cloud, which provides full control over your update strategy—allowing you to schedule updates, fix specific versions, or enable automatic upgrades across all devices.
Buttons are updated by the Base Unit, either wirelessly over Wi‑Fi or via a wired connection when plugged in through USB.
ClickShare Desktop App. We recommend manually downloading and installing the latest version to ensure the App automatically updates to future releases. Once installed, an auto-update function will keep the App up to date. Do you want to enable wireless conferencing via the App? Be sure to download the MSI installer.
iOS and Android apps are updated according to your mobile device settings.
XMS Cloud updates run automatically while XMS Virtual Edge can be updated manually.
Related products
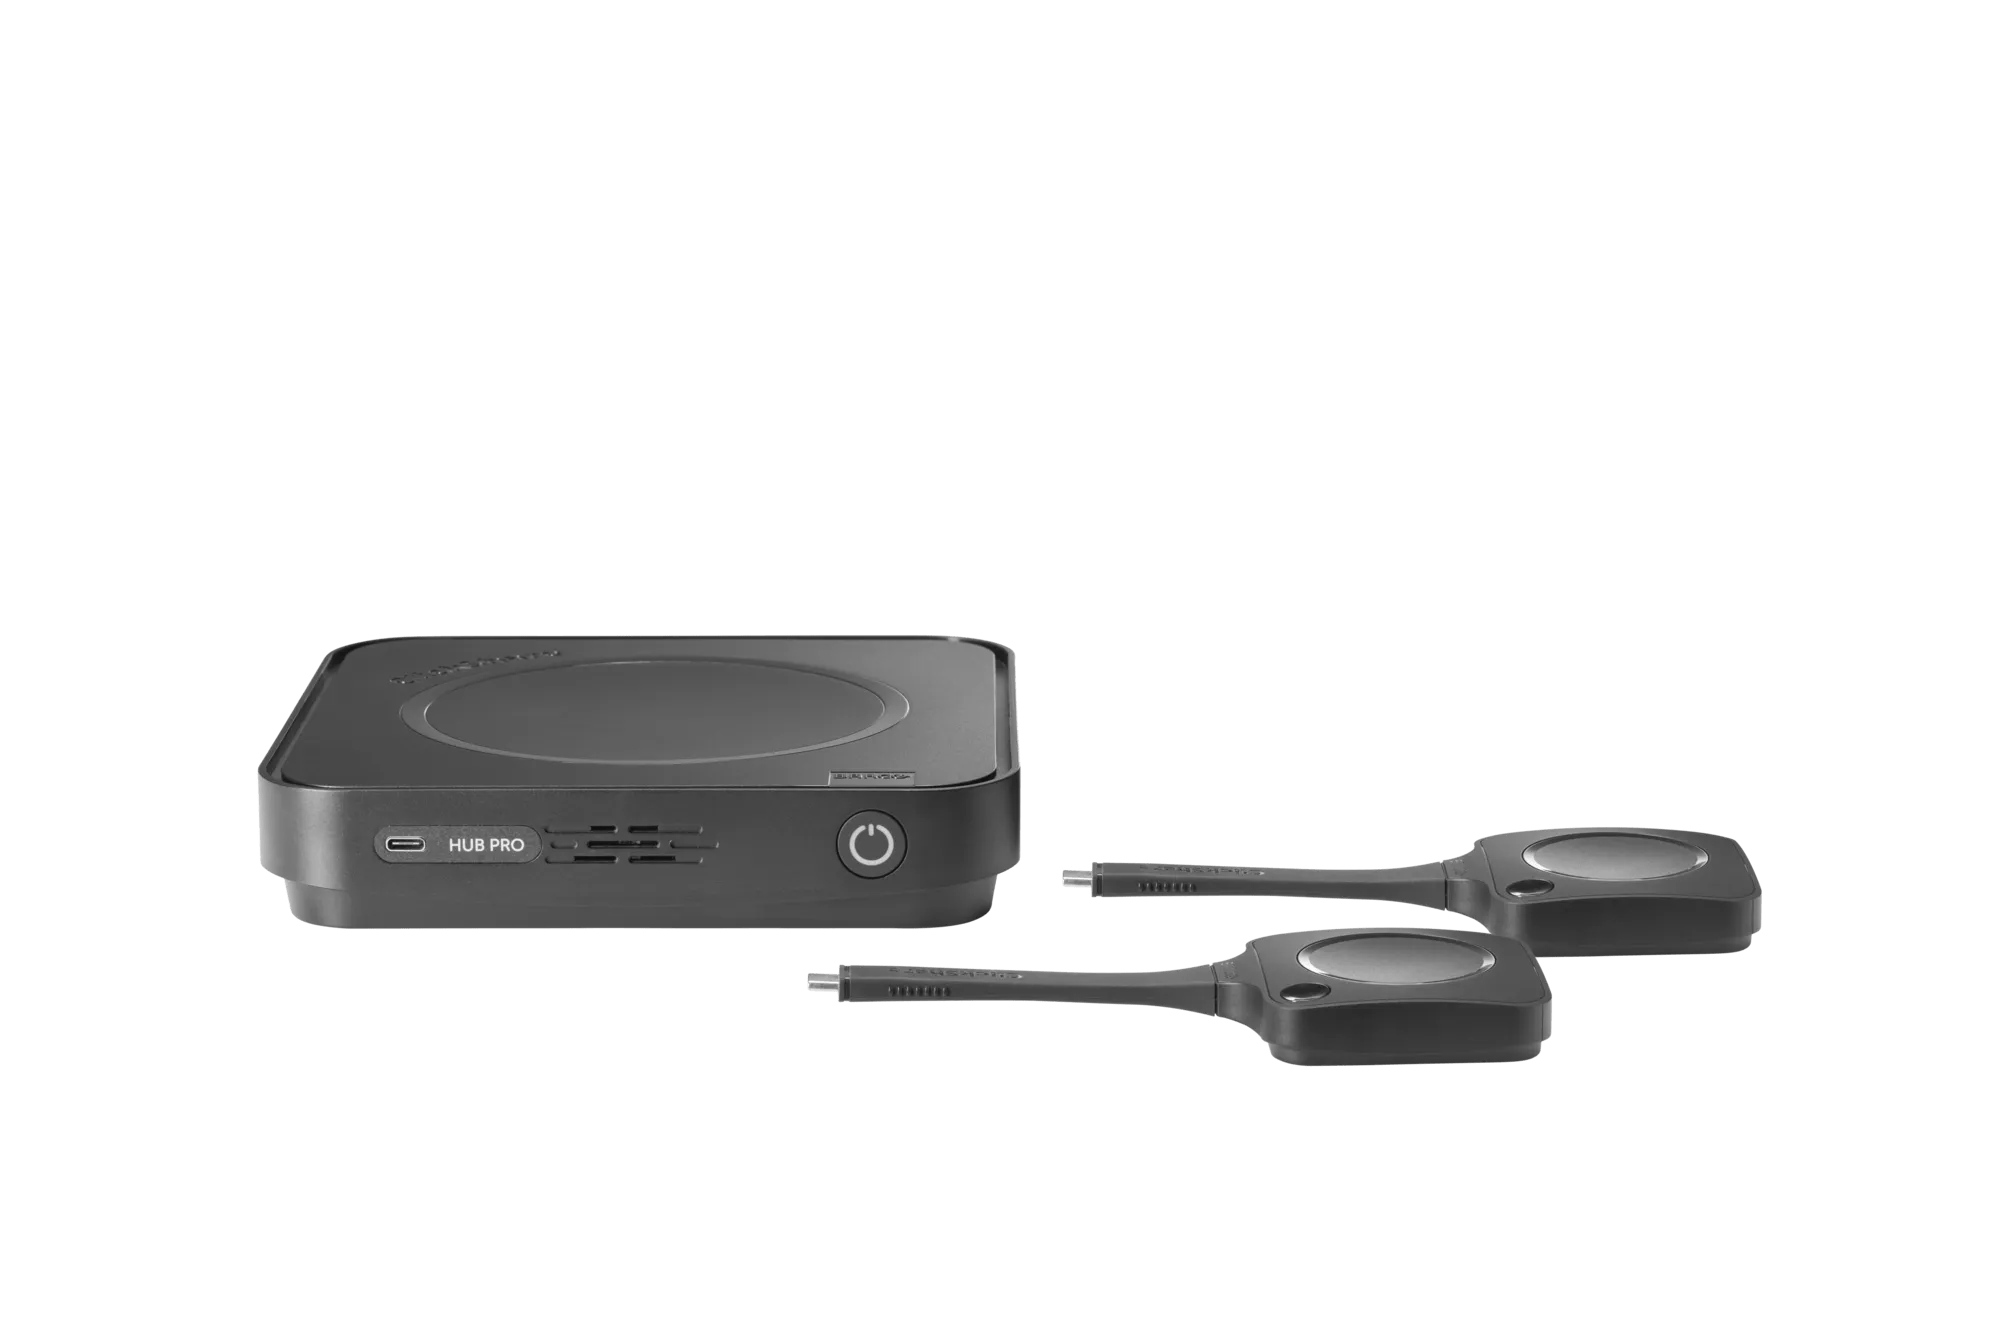
ClickShare Hub Pro
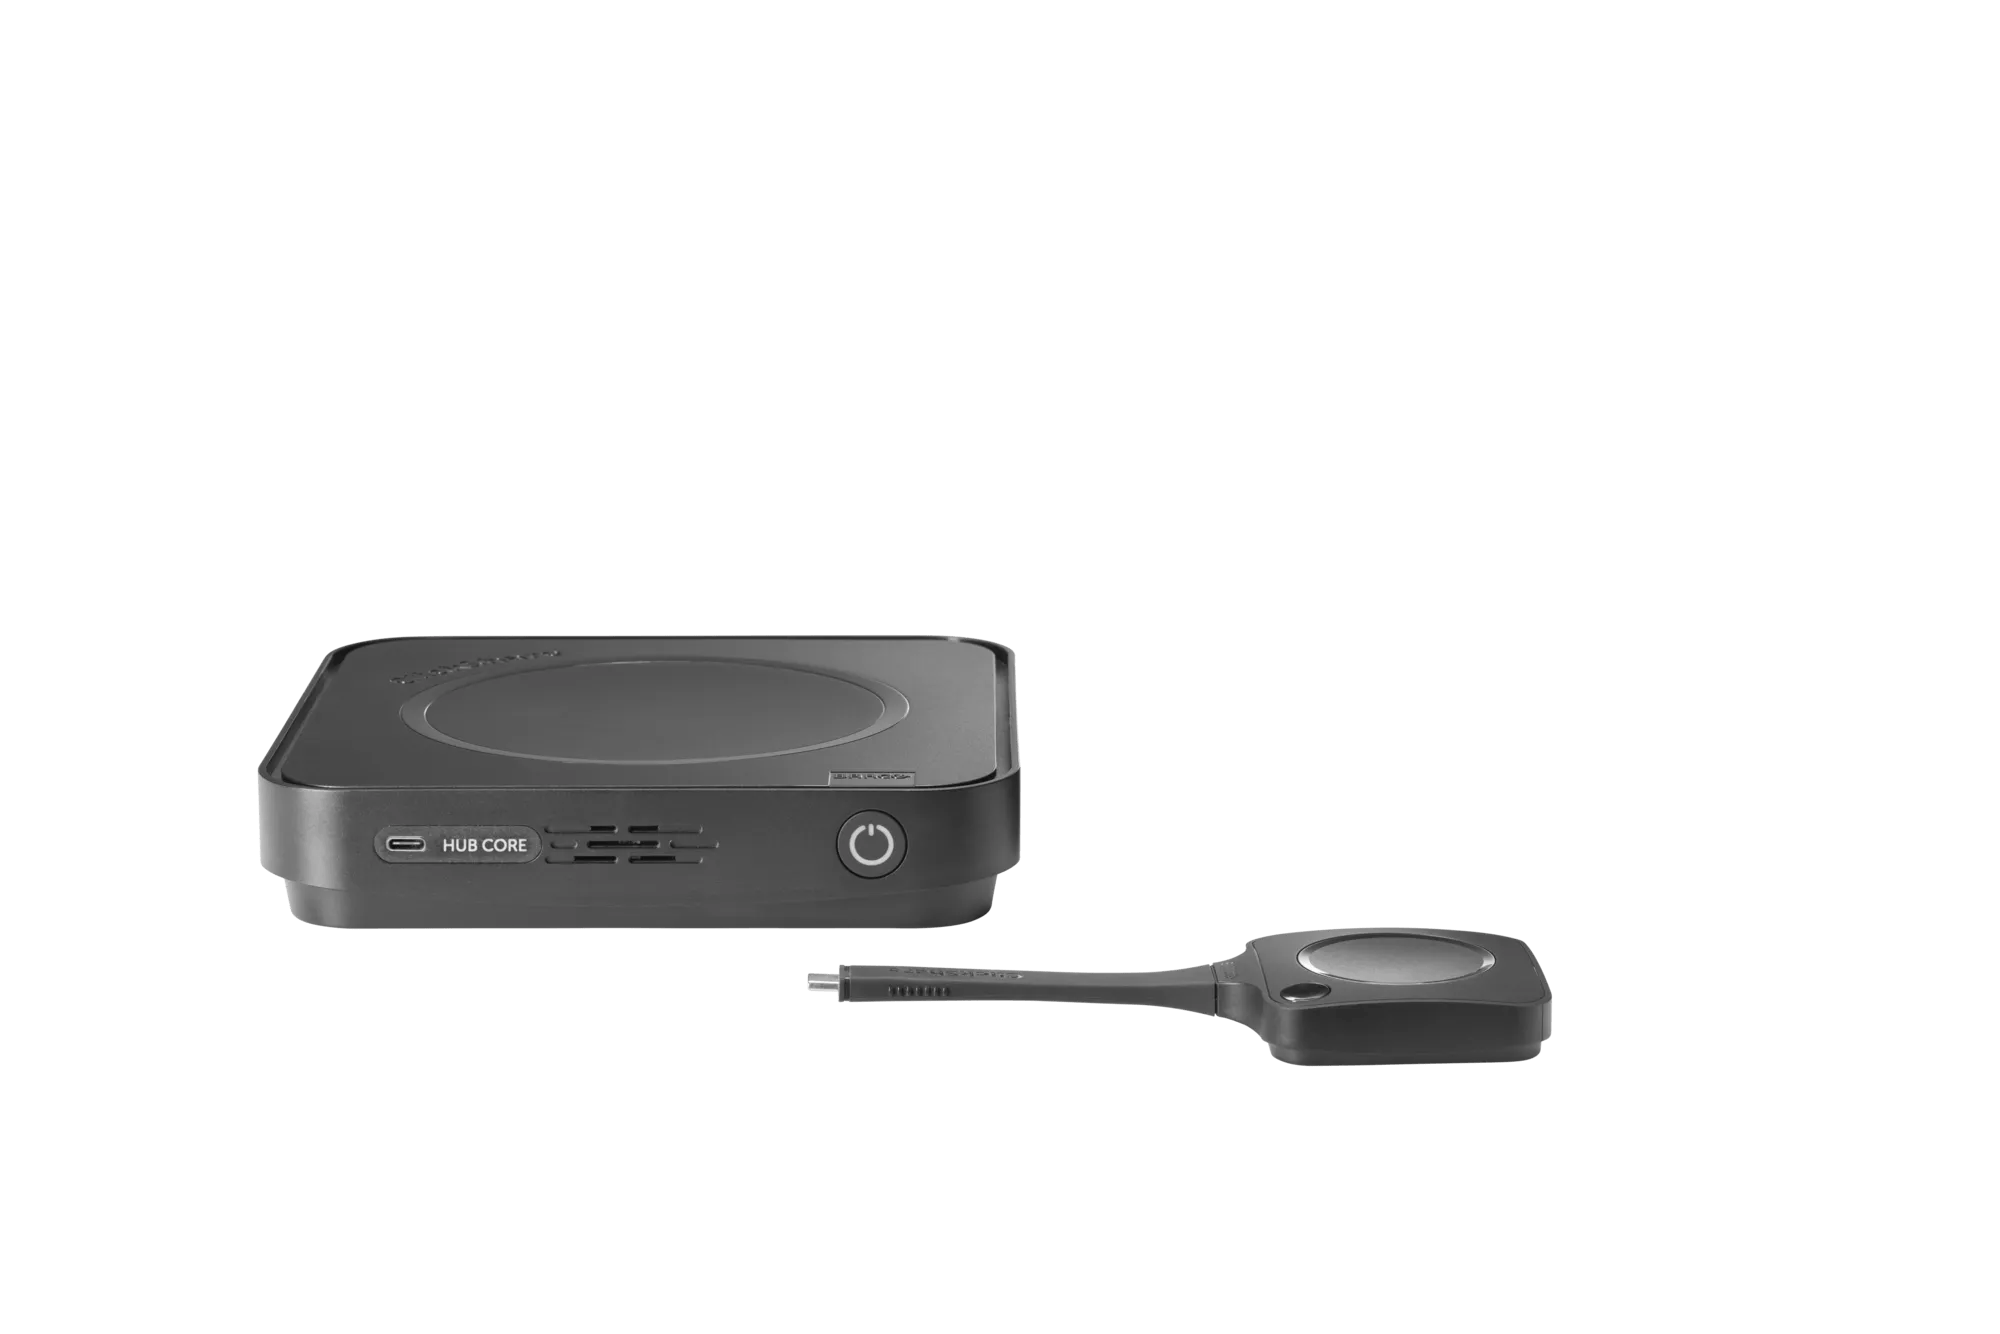
ClickShare Hub Core

ClickShare CX-50 2nd generation