
There are 3 ways to reset the ClickShare device to default settings:
Warning!
1. Restoring to factory defaults will require re-setup the Base Unit as when it came out of the box (how to: KB1835). An internet connection will be required to set up the unit again.
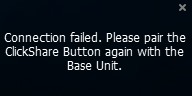
2. Restoring to factory defaults will require re-pairing of the Buttons used with that Base Unit (how to: KB5924). If you do not pair, an error message will show up when plugging the Button into the laptop.
Using ClickShare Configurator
- Log in to the ClickShare Configurator (how-to: see KB2324) and go to Support & Updates → Troubleshoot.
- Click Reset to factory defaults. The following message is displayed: This action will remove all settings of the Base Unit and replace them with the default settings. Are you sure you want to continue?
If you want to continue, click Yes, remove all settings otherwise click No, I changed my mind.
When Yes is clicked, the system initiates a reboot.

Example: Factory reset CX Base Unit
Note: Using Erase all settings option will revert the device settings to factory defaults. However, it does not remove the device from the organization account in the XMS Cloud, so there is no need to go through the onboarding procedure again.
Using reset button on the Base Unit
You need to have physical access to the device to perform the hardware reset.
-
Disconnect the ClickShare device power supply.
-
Press and hold the reset button with a paperclip or something sharp.
-
C-5/10 and CX-20/30/50: The reset button is located on the back of the device (marked in yellow), not to be confused with the power button on the front.
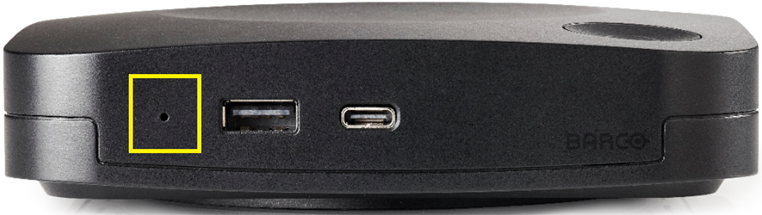
C-5/10 (Gen1 & Gen2) and CX-20/30 (Gen1 & Gen2)
CX-50 Gen1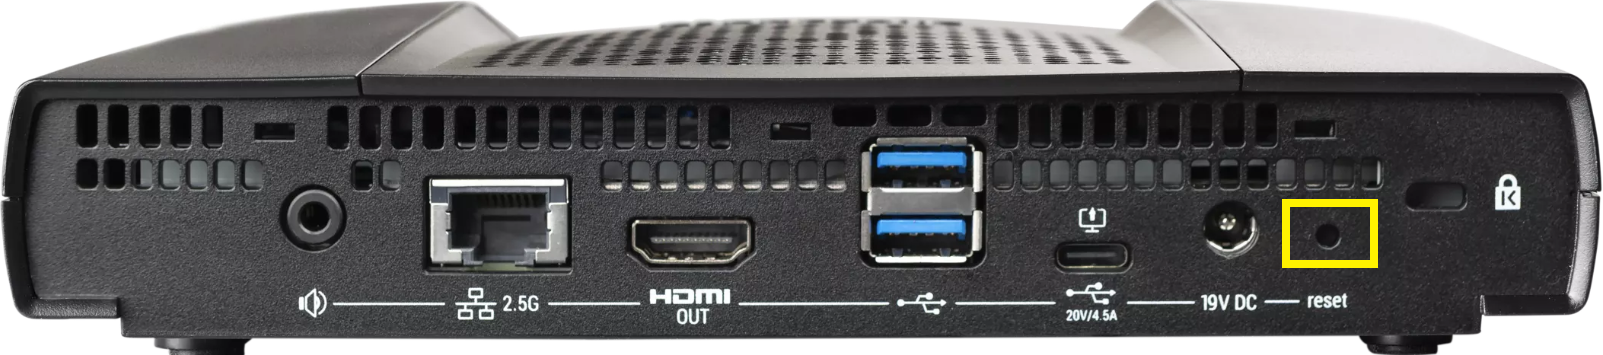
CX-50 Gen2 - Bar Core/Pro: The reset button is located on the right side of the device (red arrow) when you are standing in front of its camera module.

Bar Core/Pro
-
-
While holding the reset button, reconnect your ClickShare's power supply.
-
Hold the reset button until you observe the following behavior on your ClickShare's device power LED:
-
C-5/10 and CX-20/30/50: device’s power LED flashes red. This process can take up to one minute.
-
Bar Core/Pro: Depending on the firmware version installed on your CB Core/Pro device, the LED color on the camera module may change as follows:
-
Versions below 2.20: Blinking white to multi-color flashing animation.
-
Version 2.20 and higher: Blinking white to blinking red.
-
-
Video tutorial:
See it in action in the video below for C-5/10 and CX-20/30/50:
Using XMS Cloud
- Connect to the XMS Cloud and log in with your credentials (how to: see KB2534).
- If you have rights to more than one tenant, select the right tenant/company name in which this Base Unit is located.
- Navigate to Manage > Baseunits page and select the ClickShare device(s) from the list.
- Depending on the number of ClickShare devices selected, the factory reset process can be initiated in different ways. See the examples below:
Two or more Base Units are selected:
Click the three vertical dots and then click Delete Baseunit(s).
Single Base Unit is selected:
Click the three vertical dots and then click Delete Baseunit(s).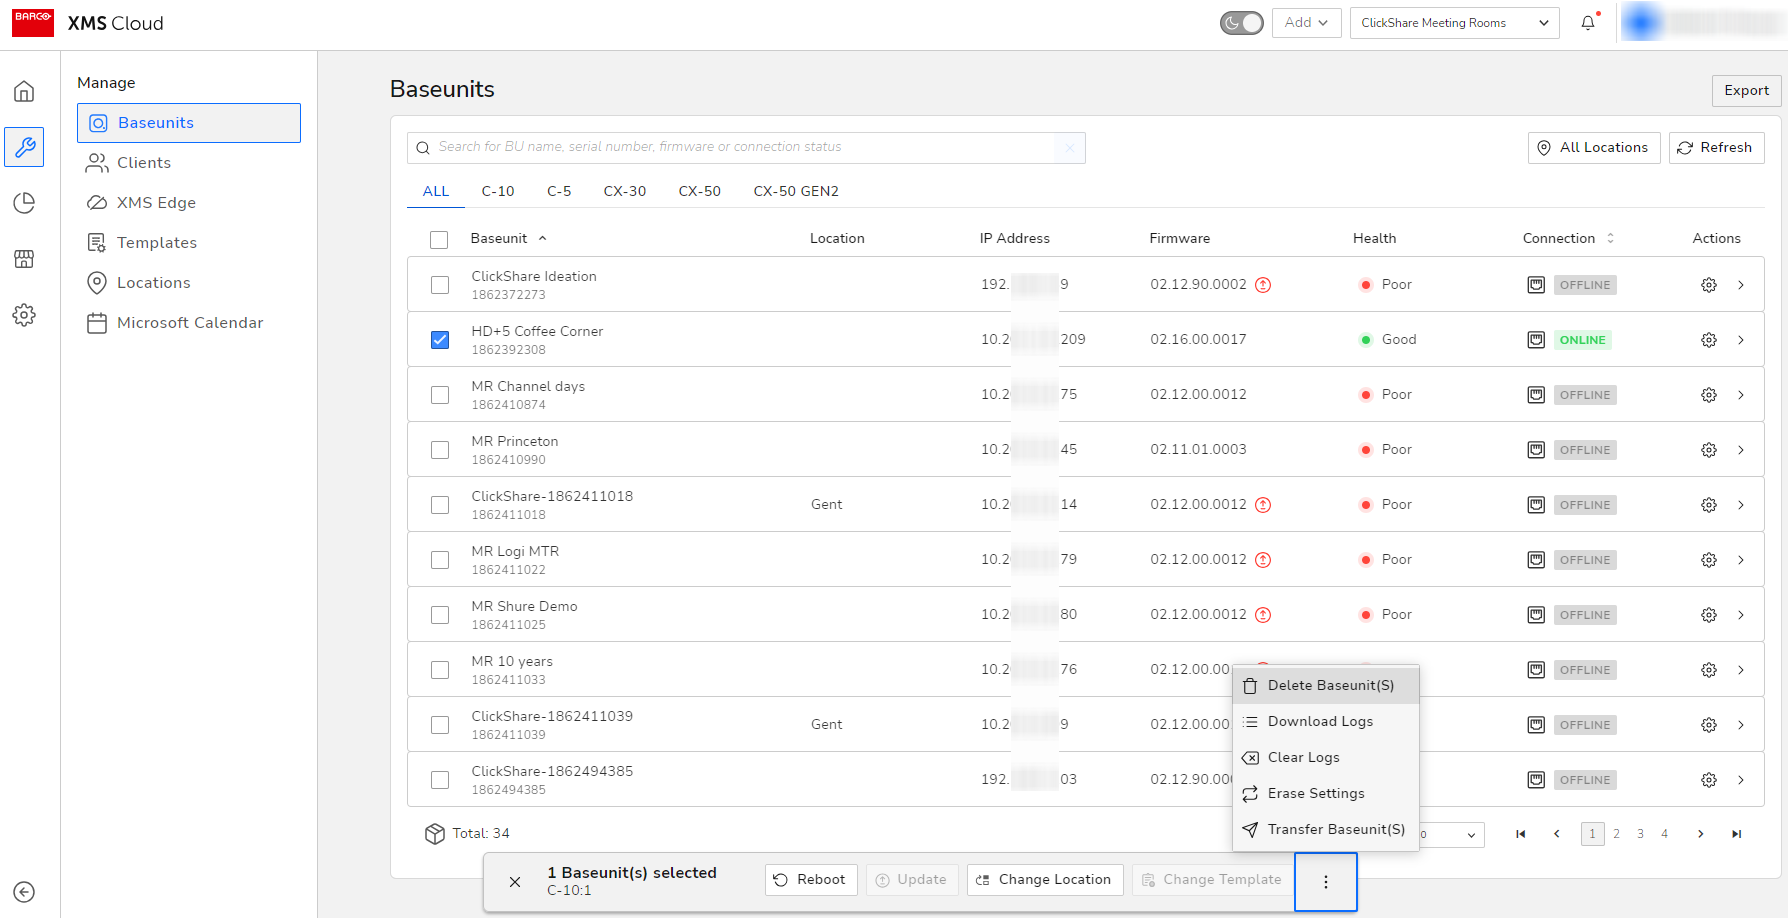
OR
In the Actions menu column, click the gear icon (see #1) of the selected Base Unit and then in the Manage Baseunit page click the three vertical dots and then click Delete Baseunit(s) (see #2).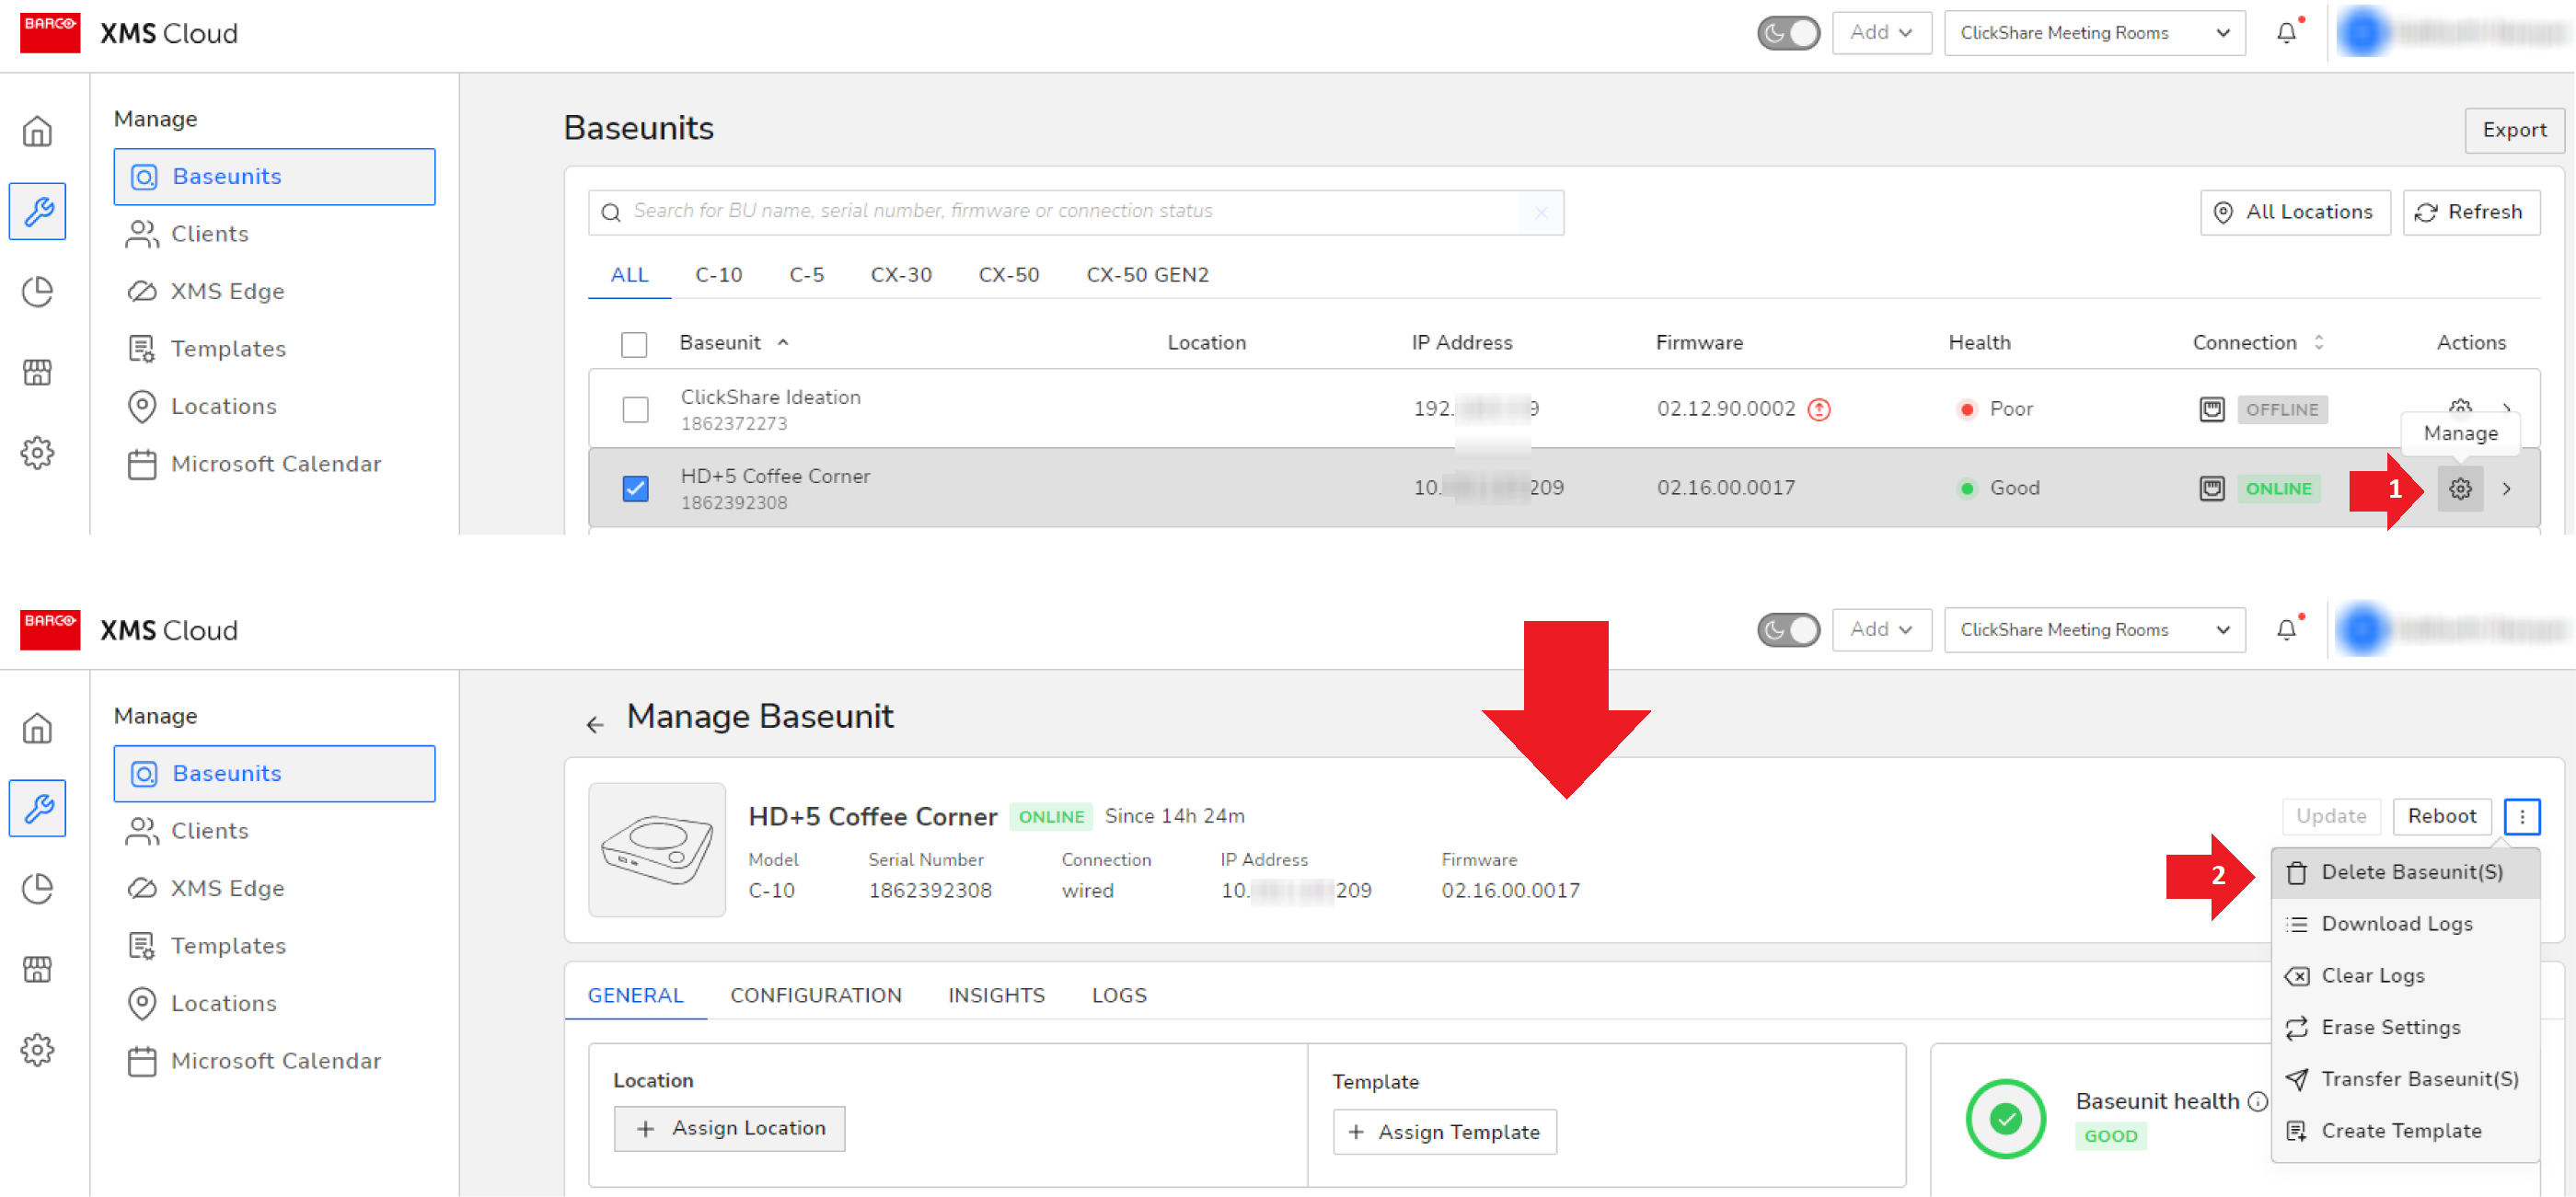
OR
In the Actions menu column, click the Quick View button (see #1) of the selected Base Unit and then in the panel that opens click the three vertical dots and then click Delete Baseunit(s) (see #2).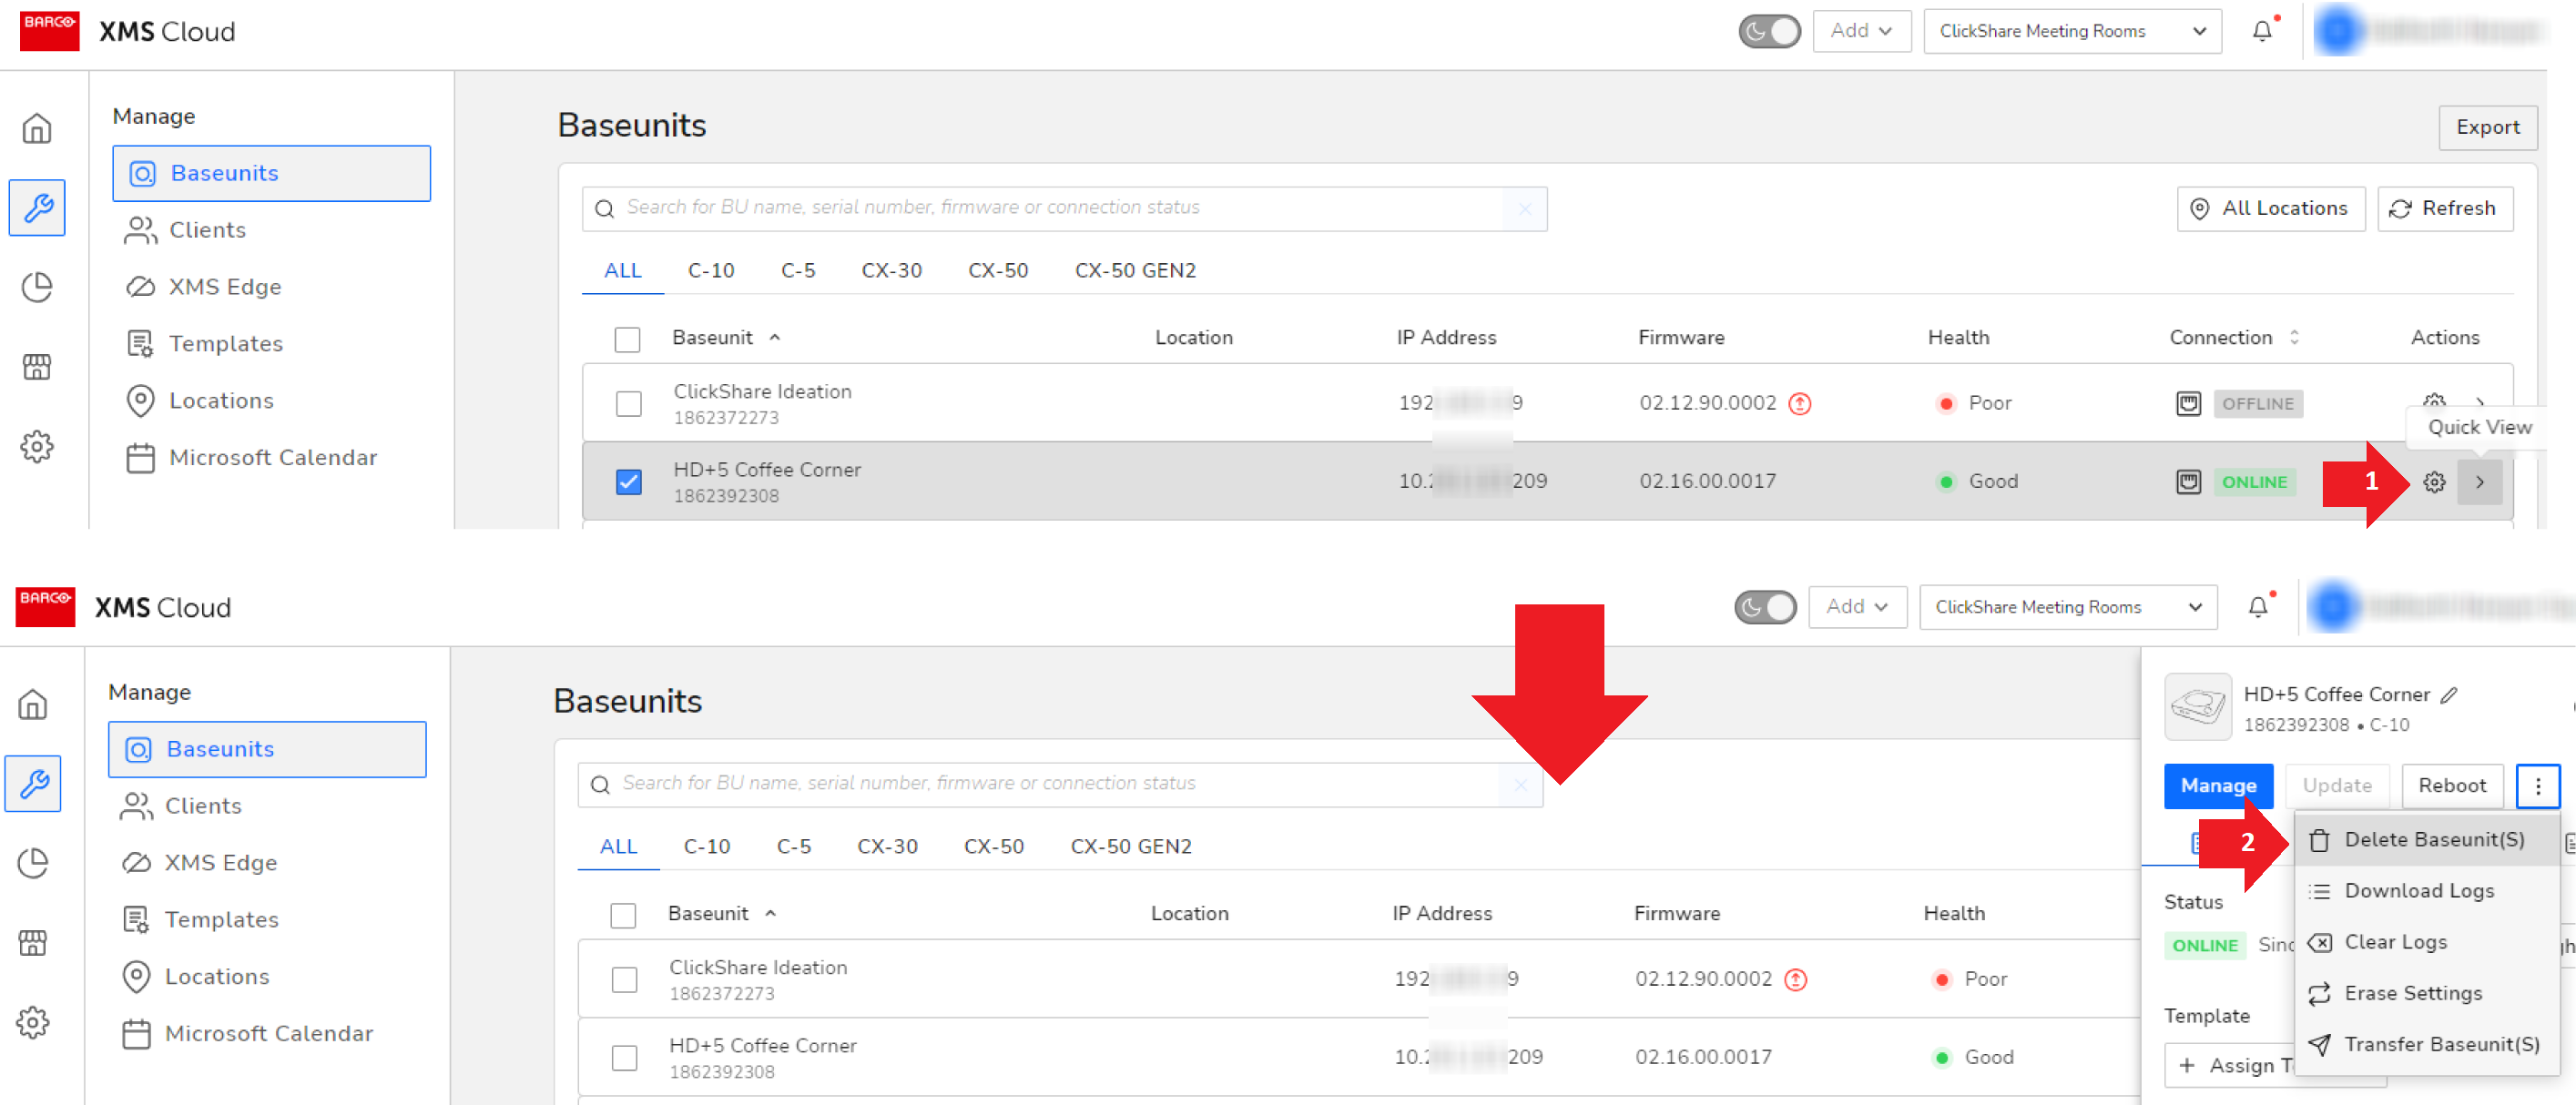
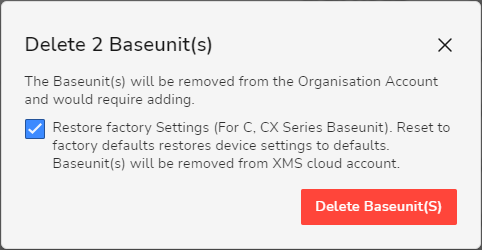
- Select the Restore factory Settings (For C, CX Series Baseunit)...(by default, selected) checkbox and click Delete Baseunit(s) to confirm reset. This will erase all settings of your Base Unit in the same way as a factory reset if the unit is online.
Contact Barco Support
In case you are still unable to reset the Base Unit or are experiencing errors while performing a factory reset, please contact Barco support by raising a service ticket (how to: see KB6024).

