7.10.10.8 Editing a source

Location
  1. Navigation side bar: Programming
  2. Central work area: PREVIEW or PROGRAM
  3. Right panel: Adjust source
About editing a source

Source modifications are applied to all usages of that source in both preview and program. Locked instances will also receive the source modifications. Any layer modification is layered on top of the source modification. For more information on layer modifications, see “Editing a layer”.

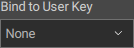
To save time, layer sources can be saved under a user key. For more information, see “User keys”.

Prerequisites

The source must be added into a layer in the central work area before it can be edited. For more information, see “Adding a source”.

How to edit
  1. Click on the desired destination from the top panel or desired screen destination group from the bottom panel.
  2. Select any layer that contains the desired source.
  3. Edit the source settings in the right panel.

    Tip: Clicking the refresh icon () will revert any changes back to their default value.
    Tip: Both settings and color of the source can be changed at the same time.
  4. Must the source edits be applied when a user key is applied?

    • If yes, select the desired user key from the drop down menu after Bind to User Key and go to next step.
    • If no, go to next step.
    Tip: These source edits can be bound to any user key, even if the user key is not related to the current source. When the bound user key is applied, then the source edits will also be applied to any instance of the current source across the entire system.
    Image 7–132
  5. Click on Save Source to commit the changes.

    Image 7–133
  6. Click the save icon () in the header.