Prerequisites
This procedure assumes that the bottom plate of the lens support is already attached to the projector and that the projection lens is installed. See procedures:
This procedure assumes that the bottom plate of the lens support is already attached to the projector and that the projection lens is installed. See procedures:
Allen wrench 5 mm
Disable the Horizontal and Vertical shift via Pulse Prospector: > >
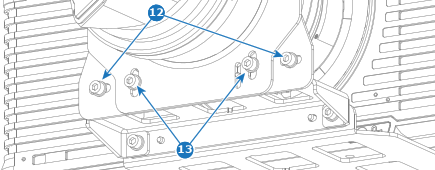
Install the 3 bottom brackets of the lens support. Do not tighten the screws (reference 12 and 13) of the brackets 2 and 3. Provide each screw with a plain washer.
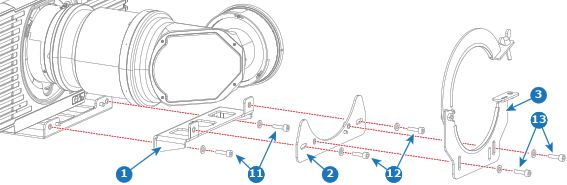
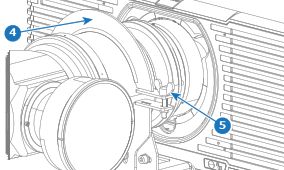
Close the top bracket (reference 4) of the lens support and secure with a wing nut (reference 5).
Firmly tighten the four screws (reference 12 and 13).