Prerequisites
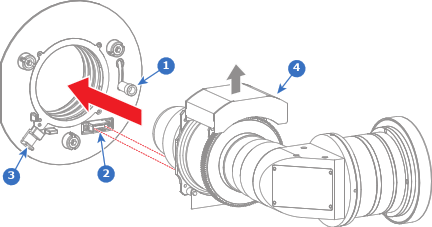
Check if the motor block of the US lens is oriented for the current projector. If not, change the orientation. See “Change the motor block orientation”.
Check if the motor block of the US lens is oriented for the current projector. If not, change the orientation. See “Change the motor block orientation”.
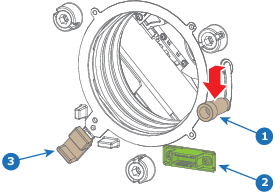
Place the primary lens lock in “unlock” position. Handle (reference 1) towards electrical socket (reference 2).
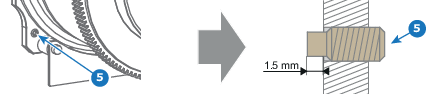
Check if the set screw (reference 5) in the lower left corner of the mounting plate on the UST lens is inserted. The set screw should exceed 1.5 mm.
Gently insert the lens. Ensure the lens connector matches the electrical socket on the lens holder.
The secondary lens lock (reference 3) makes an audible clicking sound when latching.
Check if the lens is really secured by trying to pull the lens out of the lens holder.