4.4 Installing an input board

Caution: Always wear a wrist band which is connected to the ground while handling the electrostatic discharge (ESD) sensitive parts.
Note: This procedure assumes that no optional input board is installed and that the optional input slot is sealed with a dummy cover plate. However, the same procedure is applicable in case an input board of any type is installed and need to be replaced.
Required tools

Torx screwdriver T10

How to install
  1. Switch off the projector and unplug the power cord of the projector. See procedure “Power Off the projector”.
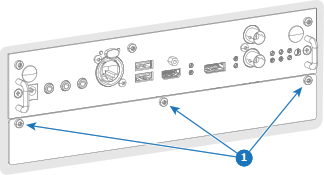
  2. Loosen the 3 captive screws (reference 1) of the dummy cover plate of the optional input slot. Use a Torx screwdriver T10.

    Image 4–6
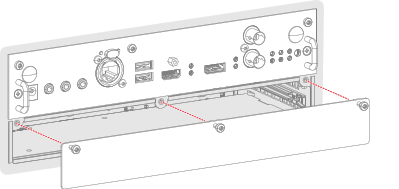
  3. Remove the dummy cover plate from the input slot.

    Image 4–7
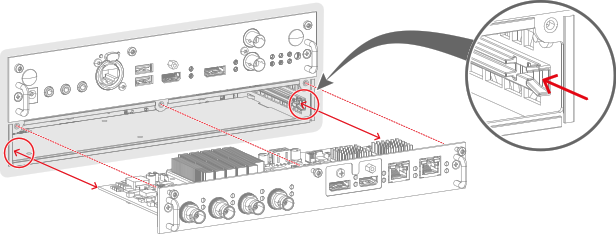
  4. Slide the input board in the input slot. Make sure the board seats in its sliders and is completely inserted in the slot.

    Image 4–8 The “Pulse Quad Combo Input” is used in this illustration.
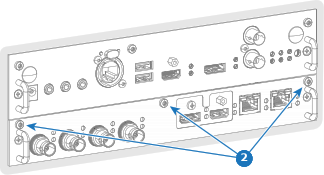
  5. Tighten the 3 captive screws (reference 2) of the input board.

    Image 4–9
  6. Plug in the power cord of the projector and switch the projector on. See procedure “Power On the projector”.
  7. Update the firmware of the installed input board. See procedure “Software update”.

    Tip: Use the complete software package to install the firmware via Pulse Prospector or USB stick. When a complete new software image is placed on the projector, all programmable components will be updated with the latest version.
Caution: Always install the dummy cover plate in case the optional input slot is not used.