Prerequisites
A computer with Event Master Toolset installed and a free ‘USB-A’ port is required to use the controller. For more information on how to install the Event Master Toolset, see “Event Master Toolset installation”.
A computer with Event Master Toolset installed and a free ‘USB-A’ port is required to use the controller. For more information on how to install the Event Master Toolset, see “Event Master Toolset installation”.
Will the controller be powered by a 250V socket?
Plug the power cable into the wall socket.
A light will go bounce back and forth among the ‘Destination’ buttons.
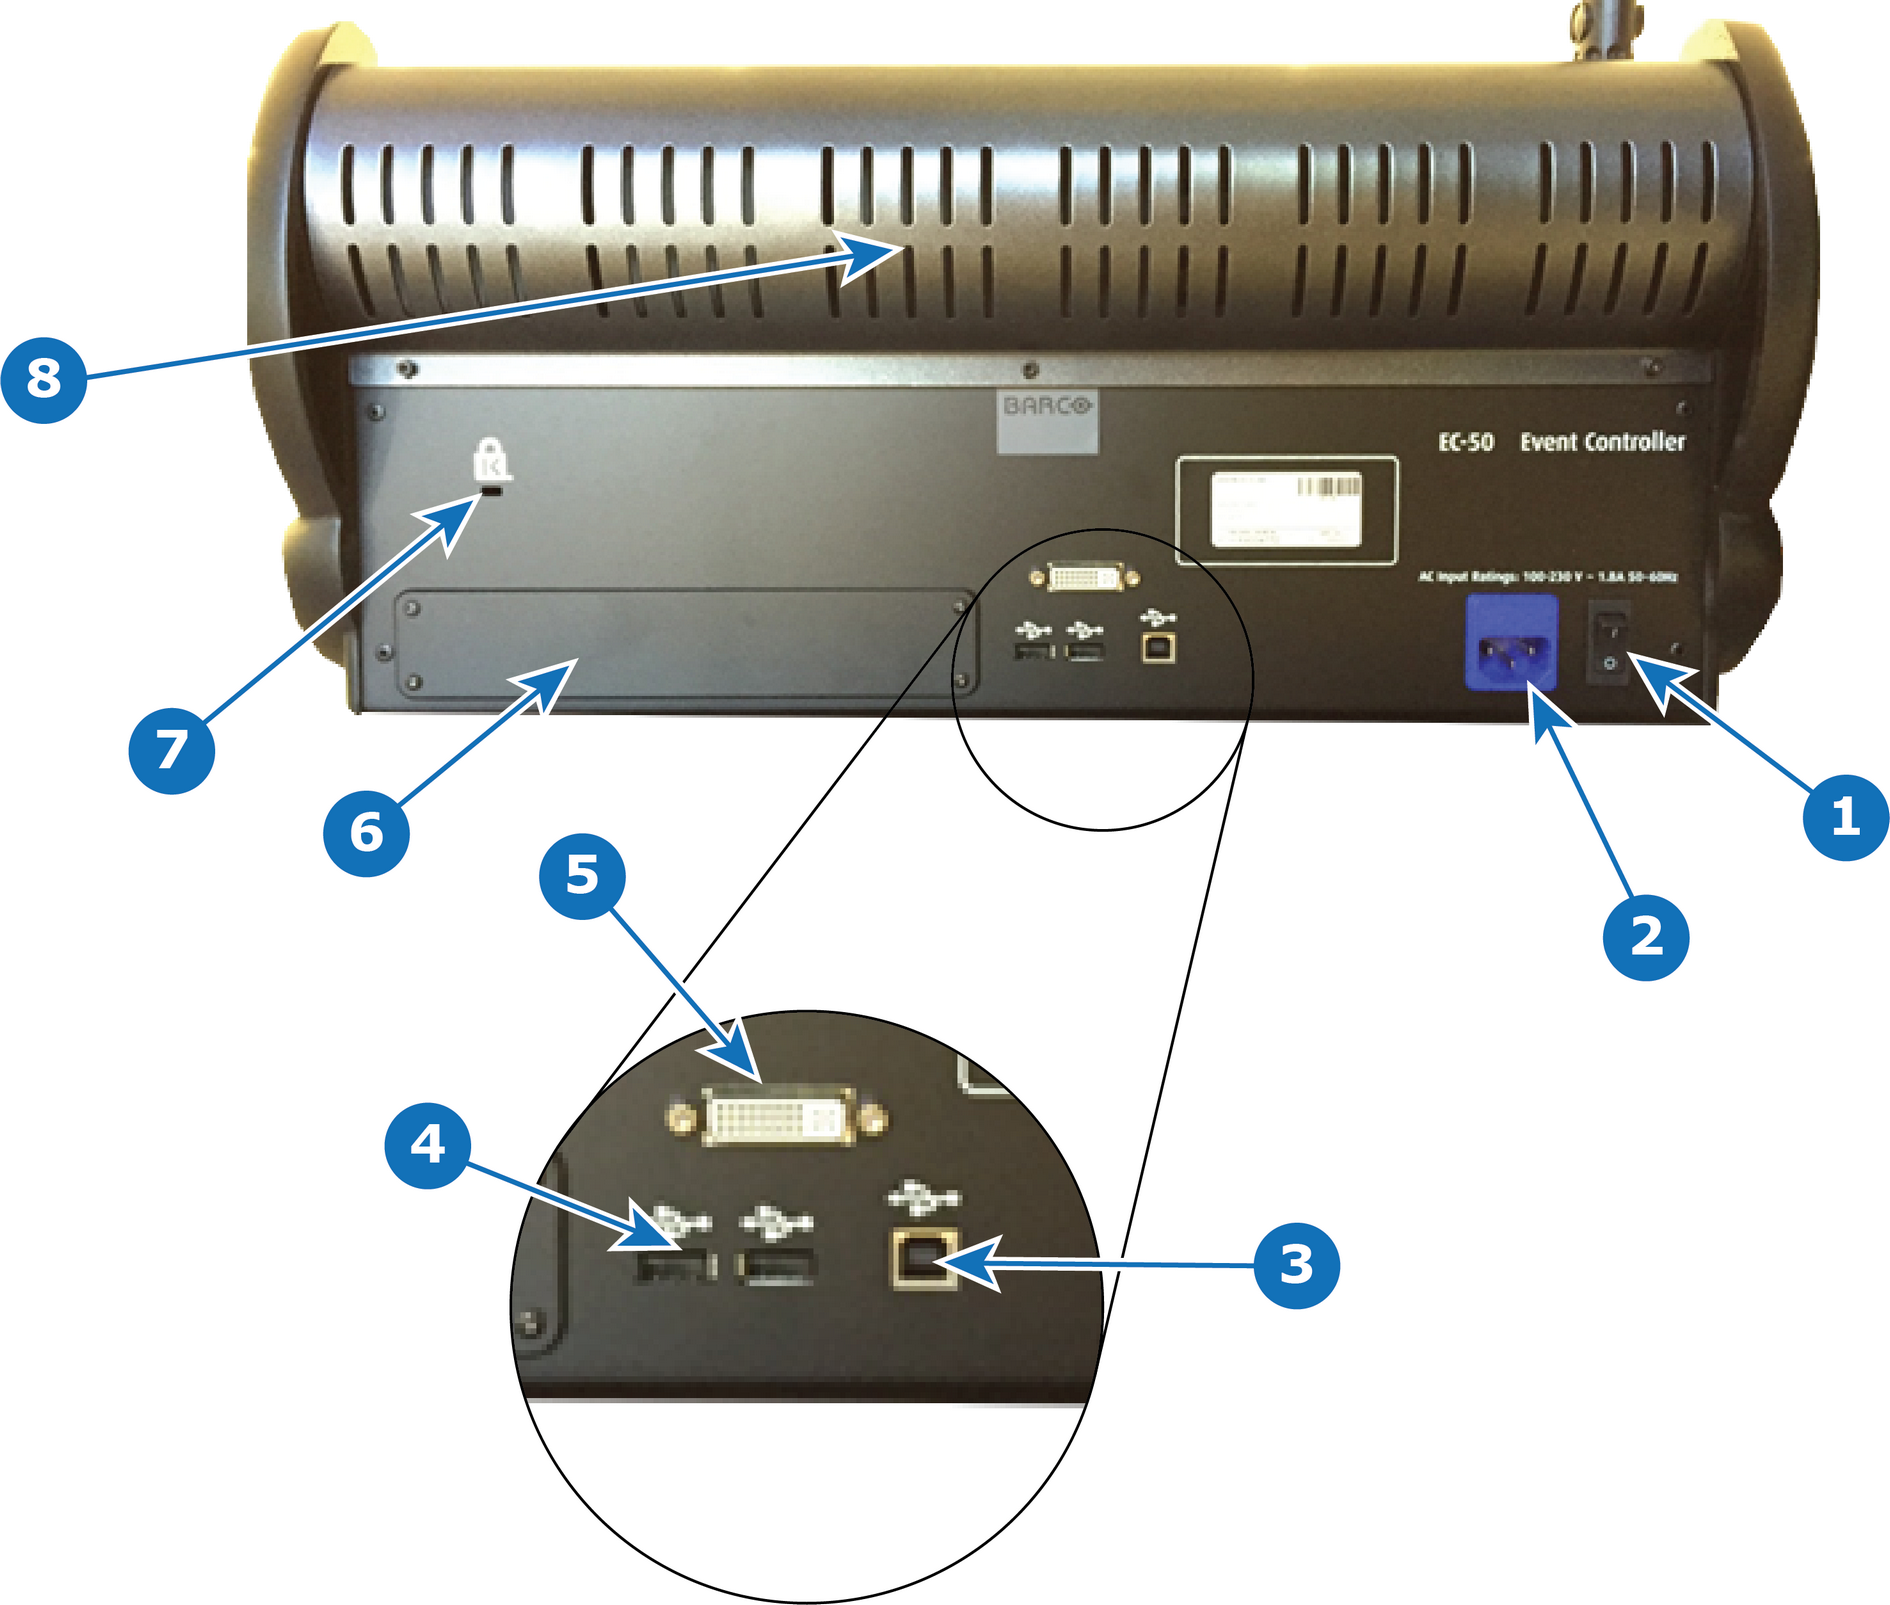
Connect a ‘USB-B to USB-A’ cable from the ‘USB-B’ port of the EC-50 (reference 3, Image 4–19) to a free ‘USB-A’ port of the computer.
The bouncing light will stop.
Is there a prompt to install the controller driver?