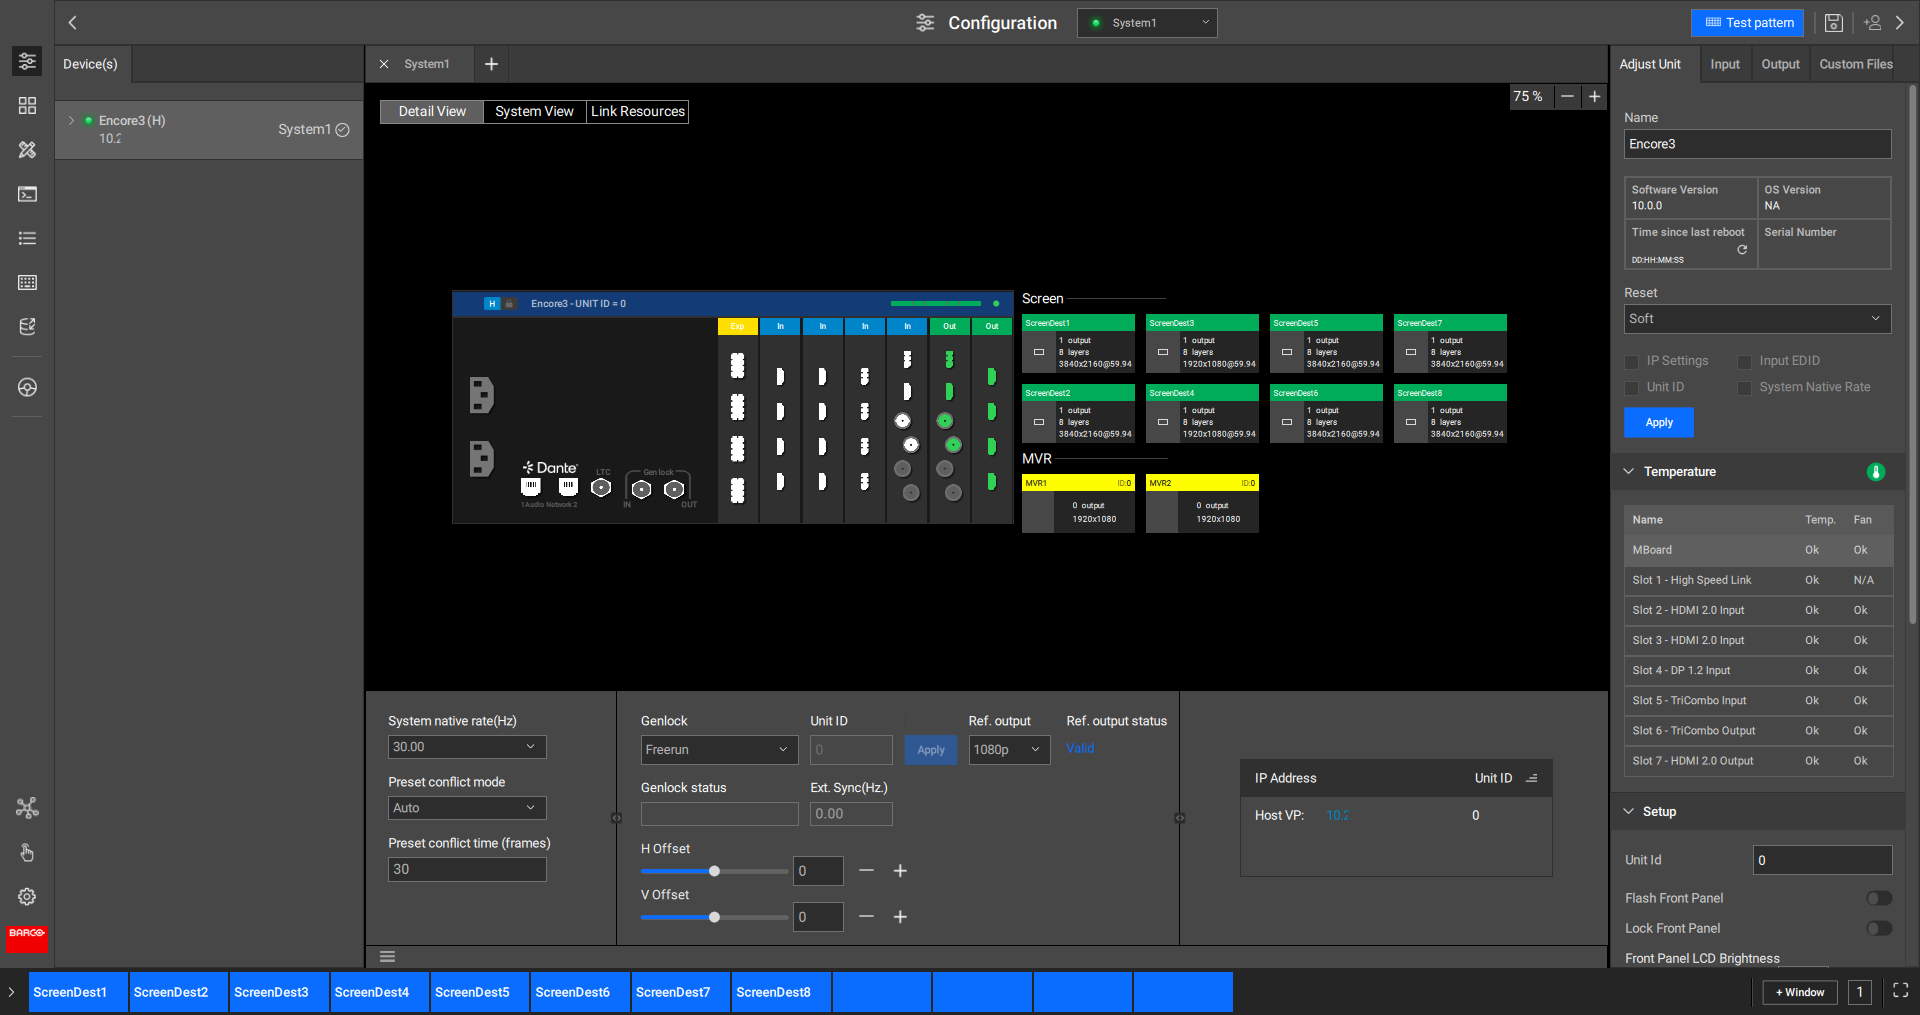
The user interface (UI) is built up in the following sections:
Navigation side bar: navigating between categories of functionality.
Header bar: manages users, systems and saving.
Central work window: gives a visual real time overview of the current settings.
Four panels: category dependant information and options.
Left panel: list of available or detected sources or units.
Top panel: toggles between sub components or views.
Right panel: selection dependant settings.
Bottom panel: settings or information relating to the system.
Footer bar: gives application related monitoring or settings.
Each of these elements purpose and functionality depends on the active category or selection. Not all elements are available in every category. Each topic will specify which menus are relevant with their ‘Location’ chapter.
Image 7–6
Mapped destinations
The mapped destination menu shows in what order the destinations are mapped to the destination buttons of controllers. Each blue segment represents a button on the controller. Pressing the corresponding button on the controller will select the destination. For more information, see “Destination buttons”.
If the mapped destinations are not visible, click the arrow () at the left of the footer.
Notices
Modifications, errors and events will be shown and logged on the footer bar. Every modification committed to the unit will be summarised in the center of the footer bar.
The following icons can appear on the right of the footer bar:
Red triangle (): there are unresolved errors or problems with the configurations or settings of the unit.
Grey circle (): a log of activities and events is available.
Clicking on the icon will open a detail window explaining the notice. It is possible to clear the list of all its entries.
Note: It is strongly recommended to resolve all errors and warnings before clearing the list.
Multiple windows
Event Master Toolset can run a maximum of two windows at the same time. These menus will each get a different ID number. When any of the two windows is closed, then the remaining window will get the ID ‘1’.
Click on the + Window push button in the footer bar to open an additional window.
Image 7–7
Full screen
Click the full screen icon () to have Event Master Toolset take up the full screen. To exit full screen, click on the exit full screen icon ().
Zoom
Some categories allow for zooming of the content in the central work window. The zoom can either be a + () or - () icon or a drop down with percentages.