7.13.2 Assign mapping

Location

Navigation side bar: Controller

Methods of assigning

There are two ways functionalities can be assigned to the controller:

How to automatically assign
  1. Select the desired console at the top of the central work area.

    Tip: In case of a virtual console, select the desired Event Master controller.
  2. Select the desired category in the left panel.

    Tip: Some categories have sub categories as well.
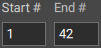
  3. Enter the start and end number of the desired range in the fields after Start # and End #.

    Image 7–192
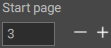
  4. Enter the desired page where the assigning must start using one of the following methods:

    • Entering a value: enter any desired value in the input field.
    • Using the + and - buttons: click on the + to increase the value with one point and on the - to decrease the value with one point.
    Tip: If the range contains more entries than available buttons on the page, then the additional entries will be added to the next page.
    Image 7–193
  5. Click the blue Assign button.
  6. Click the save icon () in the header.
How to manually assign
  1. Select the desired console at the top of the central work area.

    Tip: In case of a virtual console, select the desired Event Master controller.
  2. Select the desired category in the left panel.

    Tip: Some categories have sub categories as well.
  3. Must the mapping be done to an assign button?

    • If yes, click on the functionality button of the desired row until the desired category is shown on the dedicated display and go to next step.
    • If no, go to step 5.
  4. Must the mapping be done on a specific page?

    • If yes, navigate to the desired page using the navigation arrows in the desired row and go to next step.
    • If no, go to next step.
  5. Drag the desired functionality from the left panel to the desired button in the central work area.

    Tip: If the button supports the functionality, then it will flash while hovering over it.
    Image 7–194

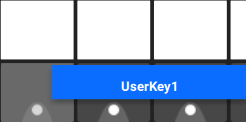
    The button dedicated display will show the name and color of the dropped functionality.

  6. Click the save icon () in the header.