
Table of contents
- 1. Registering and Logging onto the Service Portal
- 2. Navigating on the Barco Service Portal
- 3. A closer look at what you can find via the navigation bar
- 4. Useful Links
1. Registering and logging onto the Service Portal
To log into the service portal, you will need to go to the external Barco website and from there to the myBarco partner zone page or click here
- Click the link to bring you to the login/registration page
- For customers who logged in previously, provide your login details and click ‘Continue’
For new users:
- Enter the business e-mail you want to use to log into the Barco Service portal (Fig. 1)
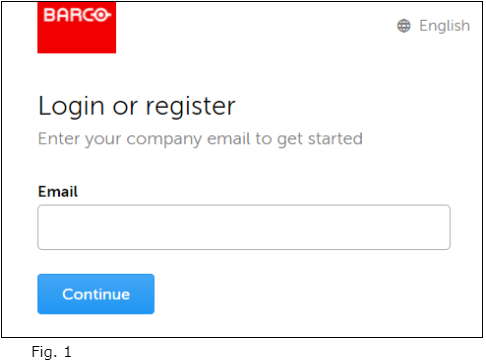
- Click ‘Continue’ to confirm
- After acceptance of your registration request as a new user by Barco, a verification code will be sent to the email address used during the registration process (Fig. 2)
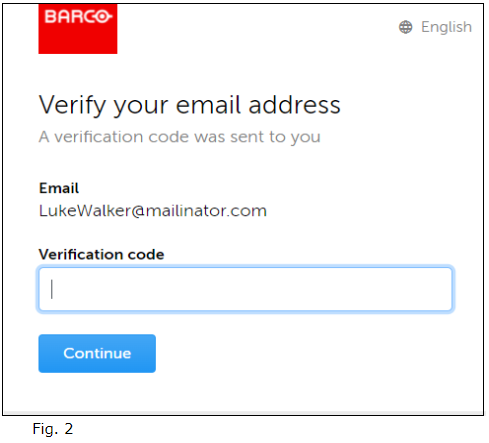
- Enter the verification code and click on ‘Continue’
- Complete the next page with the required information (Fig. 3)
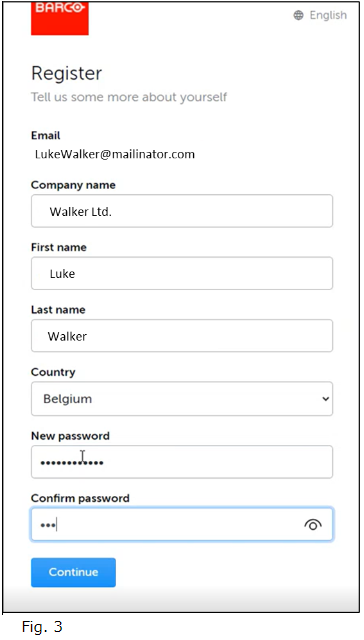
- A Salesforce account will be created for the customer company name entered
- A Salesforce Contact will be created using your First & Last name.
- The Contact will be linked to an existing domain account. In our example below, the domain is the ‘mailinator’ domain (all e-mails like this will be linked to that account).
- Create a 12-digits password
- Click ‘Continue’ to get to the welcome page of Barco Service portal (Fig. 4)

(Fig. 4)
2. Navigating on the Barco Service portal
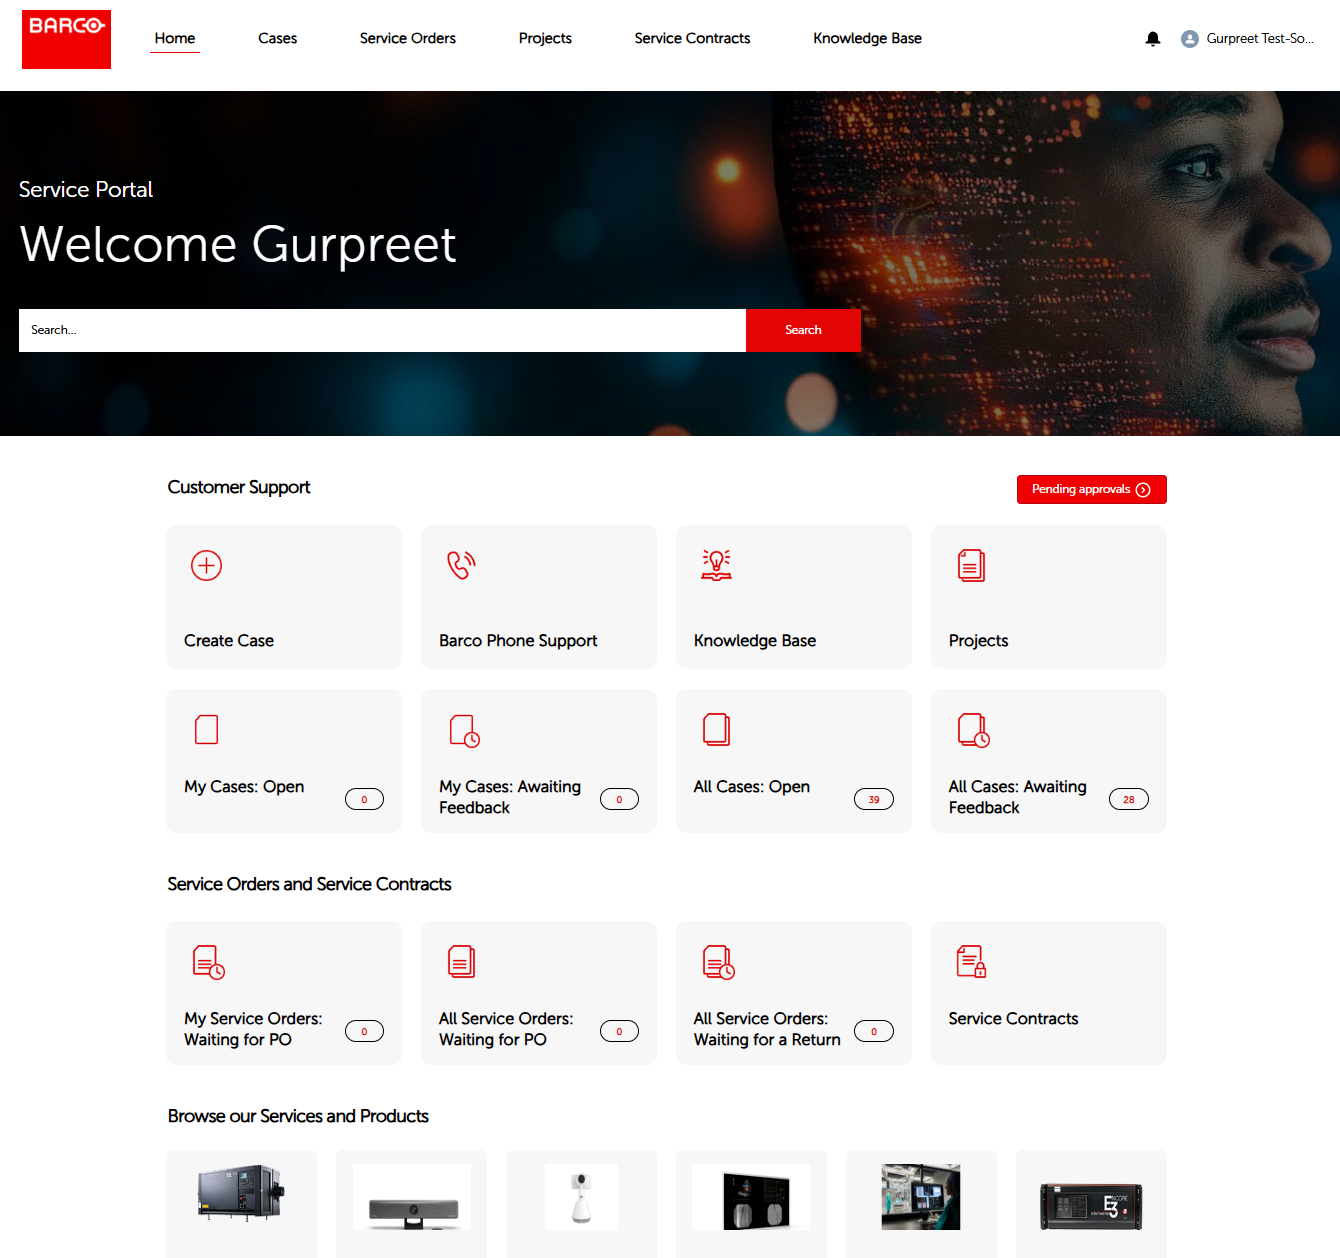
All information found on the service portal is related to the person that has logged in. Below is an example of the homepage (Fig. 5).
(Fig. 5)
On the home page you will find the following features:
- A search bar is at the top of your screen. It is important to note that this search function only returns information from Service portal-specific data.
- Search Button
- Your profile information includes
- Home: return to the home screen
- Logout
- A navigation bar that includes:
- Home
- Cases
- Shows all types of Cases
- Service Orders
- Shows all types of Work Orders
- Projects
- Shows all active Projects
- Service Contracts
- Shows all active Service Contracts
- Knowledge Base
- Shows the top trending and top new KB articles accross all Business Units of Barco
- Buttons to help you navigate the Portal
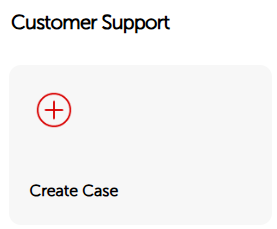
- Customer Support
- Where a new case can be created
- Service Orders and Service Contracts
- Where owned service orders and also company-wide service orders can be consulted
- Browse our Services and Products
- This section redirects to the product landing page
- Customer Support
3. A closer look at what you can find via the navigation bar
Cases
Click on ‘Cases’ to get essential case information.
Click on the little arrow to select the type of List view you prefer (Fig.6)
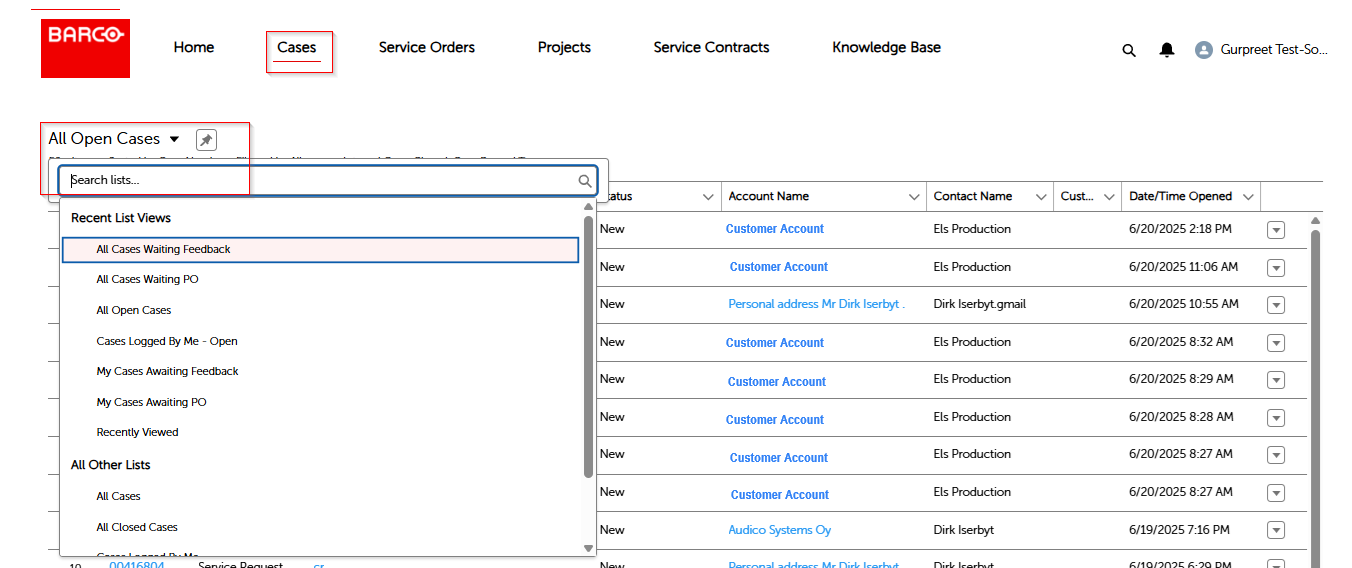
(Fig. 6)
Similar to the way of working for Cases, when clicking on Service Orders, you will get an overview of your work orders. (Fig. 7)
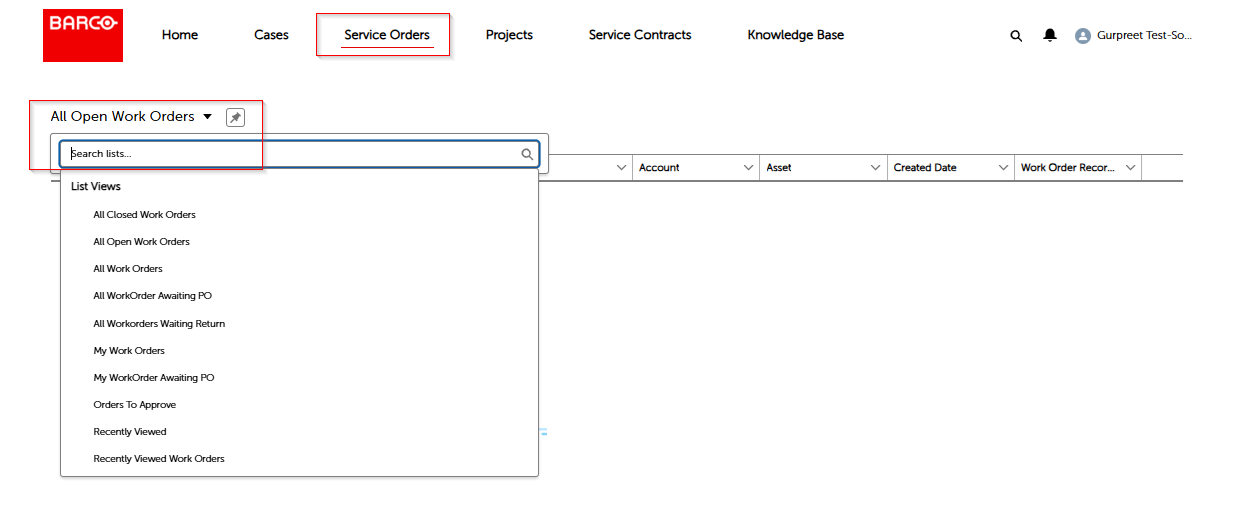
(Fig. 7)
Similar to the way of working for Cases, when clicking on Projects, you will get an overview of your projects.
Please note that for Projects you will see only 2 available List views: (Fig. 8)
- All or Recently viewed
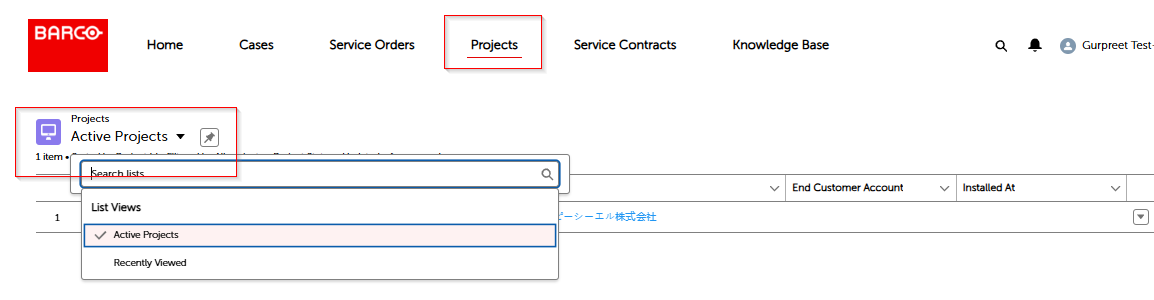
(Fig. 8)
The user can click on 'Service Contracts’ to get an overview of those service contracts. An overview is provided giving you some essential information about the service contracts in a quick, easy view. (Fig. 9)
The following list views are available:
-
All Active Service Contracts:
- Displays all active service contracts.
- These contracts are currently within their start and end dates (i.e., the service is ongoing).
- Contracts that have not yet started or have already expired will not be included.
-
All Future Service Contracts:
- These contracts have a start date in the future and have status inactive but not cancelled yet, they have not started providing services.
-
All Service Contracts:
- Displays all service contracts associated with the account, regardless of their status (active, released, future, expired, etc.).
-
Recently Viewed:
- This will display a list of contracts that you have recently visited.
- It helps users quickly access contracts they interacted with recently, regardless of the contract's status (active, released, future, etc.).

(Fig. 9)
When you click on the Knowledge Base, you'll see the top trending and newest articles from all of Barco's business units. A search bar is also available to help finding specific articles (Fig .10)

(Fig .10)
By clicking on ‘Create Case’, it starts the process of case creation. (Fig .11)
(Fig .11)
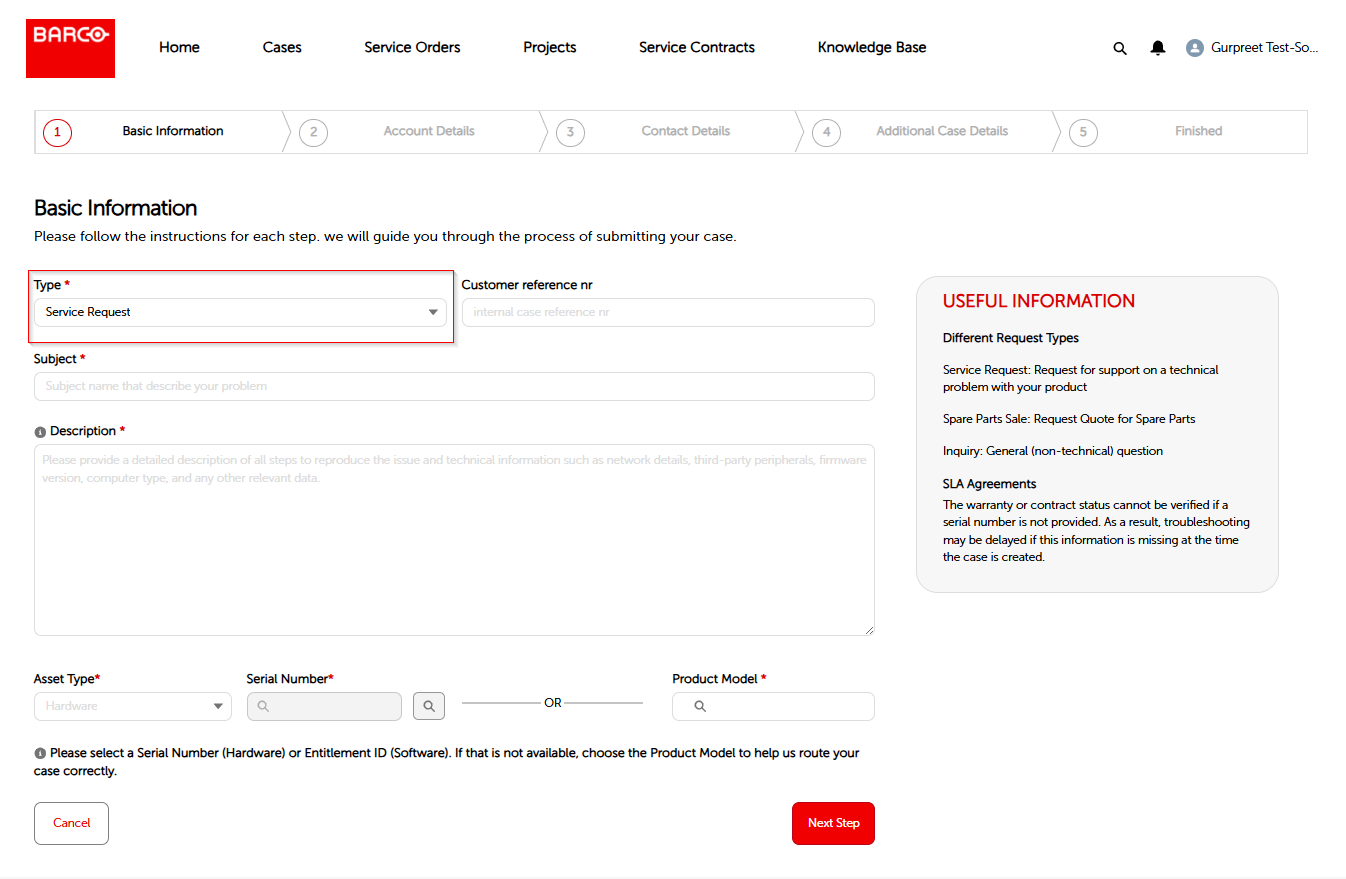
At the top of your screen, you can see a ‘path’, which is an overview of the process needed to create your case.
Step1) Basic Information
Underneath there are some fields to fill out:
-
Type including:
- Inquiry: Typically, a non-product-related question. When you want to register a product-related issue, you need to select ‘Service Request’.
- Service Request: For product-related issues.
- This is the biggest flow where we ask for you to specify a product model, an asset, an entitlement ID, or a manufacturing serial number.
- Spare Part Sales: Here you can choose the product model and register a case.
- Customer reference nr:
- internal case reference nr (not mandatory)
- Subject:
- A brief description of the topic
- Description:
- Provide a detailed description with all technical information and steps to reproduce the problem
- Asset Type:
- Hardware or Software
- Serial Number or Product Model:
- S/N of the device or Product Model Name
Step2) Account Details
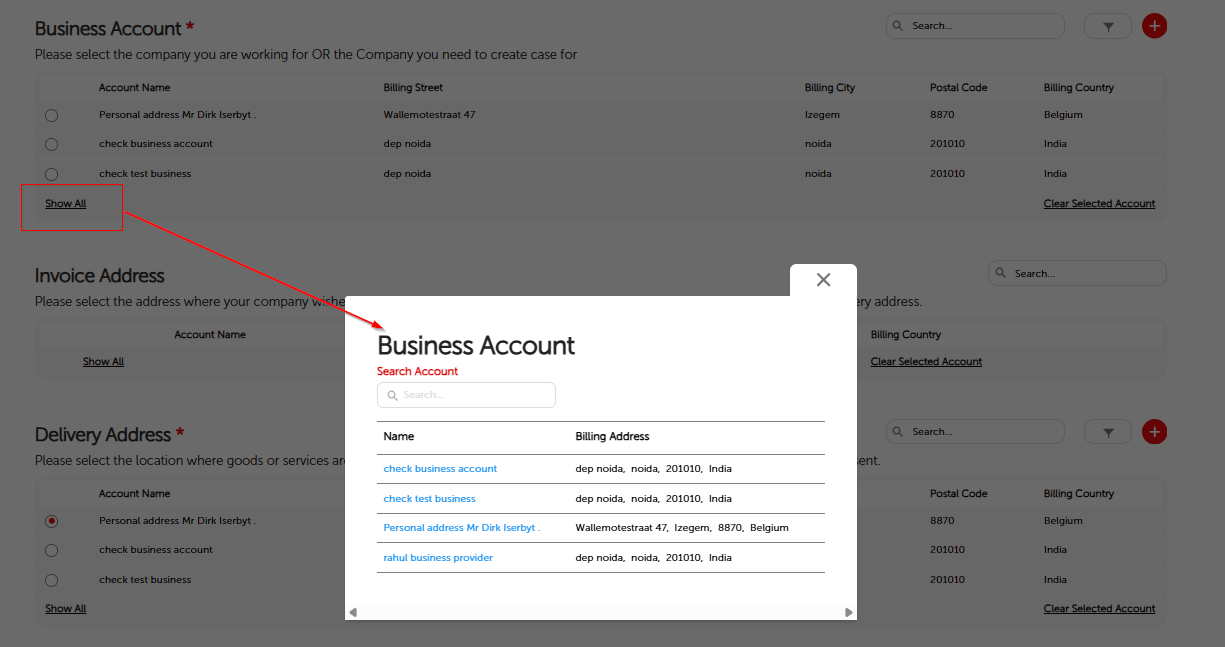
From this page, select (Fig .12), search (Fig .13 & .14) or create (Fig .15) Business Acounts, Invoice Addresses and Delivery Addresses
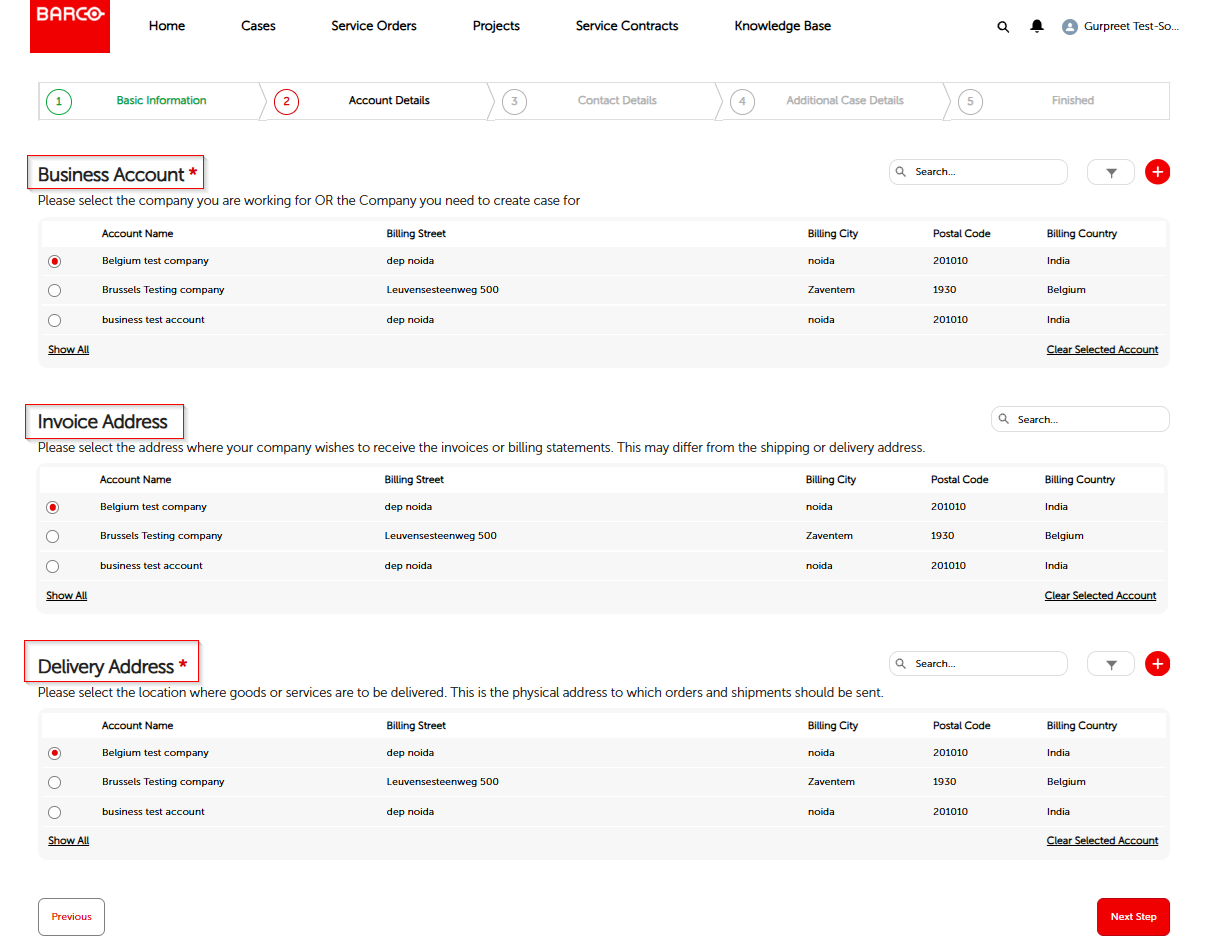
(Fig. 12)
A filter option (Fig. 13) or a search bar (Fig. 14) can be used to search an existing account
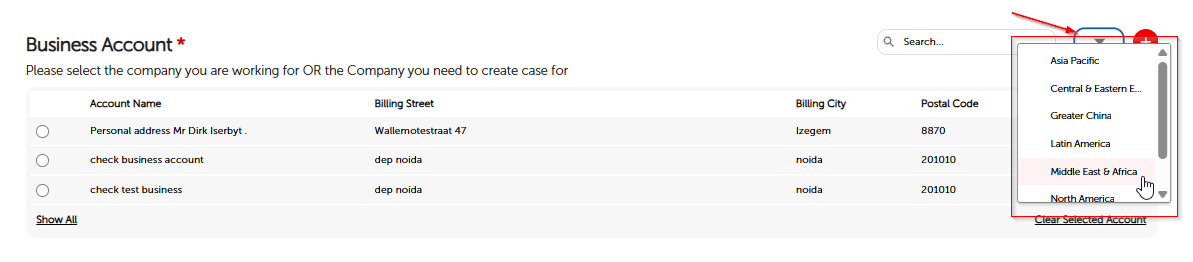
(Fig .13)

(Fig. 14)
Click on Show All, to expand All Business Accounts.
Searches can be conducted based on any of the five available parameters :
- Account Name
- Billing street
- Billing City
- Postal code
- Country
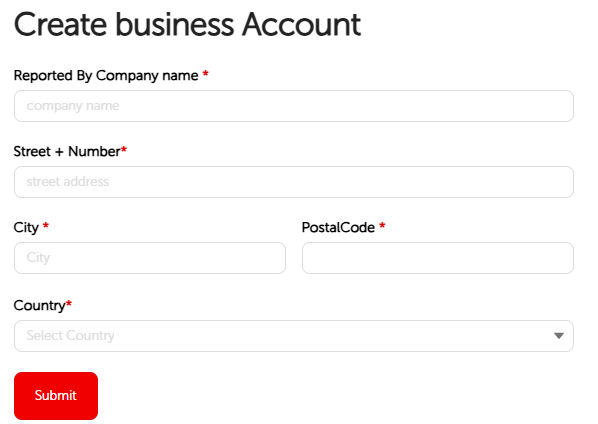
(Fig .15)
Step 3) Contact Details
In Contact Details, a Ship to Contact can be added (Fig. 16)
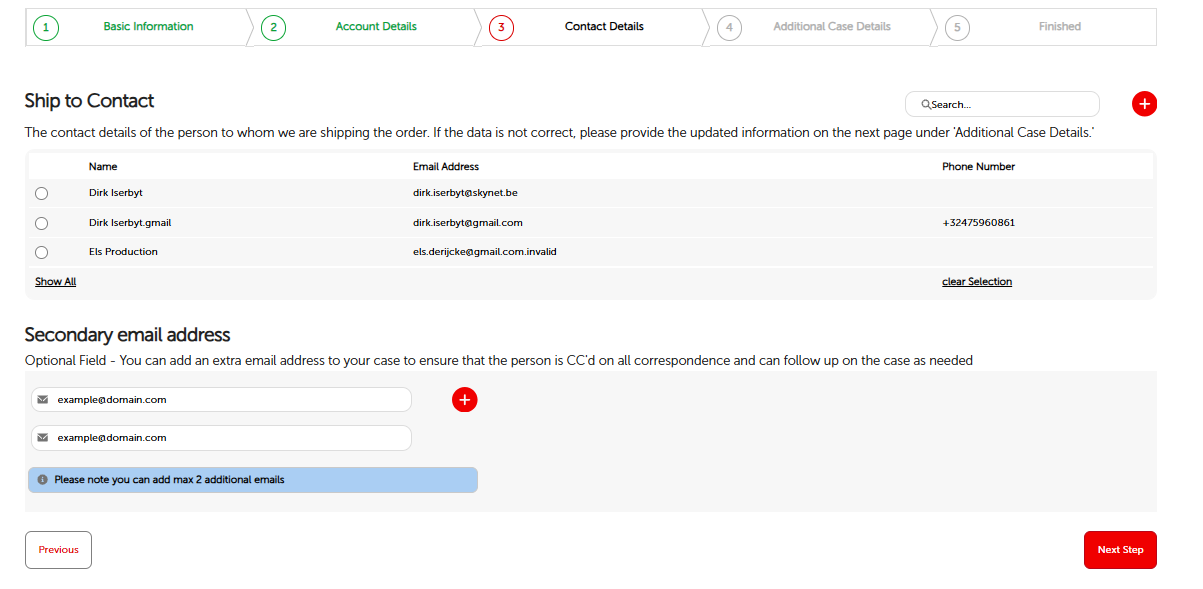
(Fig. 16)
Step 4) Additional Case Details
This section allows for final modifications to the case, including the title and issue description. Additionally, files can be uploaded before the case is submitted (Fig. 17)
Note: Upload limit has increased to 2 TB now
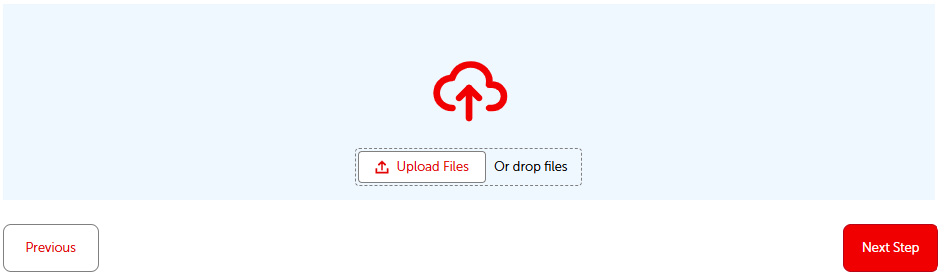
(Fig. 17)
Step 5) Case Creation

Clicking on the "Finish" Button, will open a new page that summarizes the case information and provides an overview to the latest case status.
Where to buy our products
To find where you can buy our Barco products, click here for more info.
Service locator - Barco
To find our country-based Services partners, click here for more info.
Knowledge base articles
To find out product-related knowledge base articles, click here.

