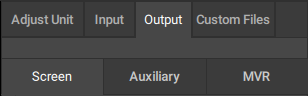
7.8.5.2 Creating destinations

Location
  1. Navigation side bar: Configuration
  2. Central work window: Detail View
  3. Right panel: Output > Screen or Auxiliary
How to create
  1. What destination must be added?

    • For screen destination, select Screen in the right panel.
    • For aux destination, select Auxiliary in the right panel.
    Image 7–61
  2. Fill out the information about the screen in the New section of the chosen destination.

    Tip: Event Master Toolset will automatically calculate how many output connections are needed to support the entered resolution.
    Tip: In case of a projection screen destination, the required blend area will be calculated depending on the entered resolution .
    Tip: Provide clear names that reflect the intended purpose.

    Output field(s) will be created in the Outputs section.

  3. Assign a connector to the generated output field using one of the following methods:

    • Click on the output field , then click on the desired connector in the central work area.
    • Drag the desired output connector from the central work onto the output field in the right panel.
    Note: Each created field must have a connector assigned.
    Note: Clicking on the + icon () to add output(s) will also increase the total resolution.

    Clicking the trash icon () to remove output(s) will also decrease the total resolution.

    Image 7–62
    Image 7–63
    Image 7–64

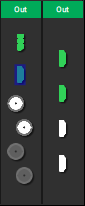
    The name of the connector will be added below the output field.

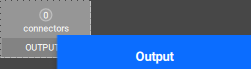
  4. Are there more than one output fields in the Outputs section? (only for screen destinations)

    • If yes, repeat previous step until all outputs have a connector and go to next step.
    • If no, go to next step.
  5. Click Create Screen Destination or Create Aux Destination to configure the outputs.

    Image 7–65
    Image 7–66

    The selected connectors will turn green, the available resources will update, the destination will show up in the mapped overview and the name will be added to the list at the bottom of the right panel.

  6. Click the save icon () in the header.