7.10.1.1 Creating a layout

Location
  1. Navigation side bar: Programming
  2. Bottom bar: Layout row
How to create
  1. Can an existing layout be used as a basis?

    • If yes, duplicate an existing group by clicking the downwards arrow () after the name in the bottom panel and select Duplicate layout.
    • If no, click the plus icon () in the Layout row of the bottom panel.
  2. Drag and drop one desired destination from the top panel to the central work area.

    Note: The check box of the destination is not part of the menu that can be dragged.
    Note: The View All cannot be dragged into the central work area.
    Image 7–98
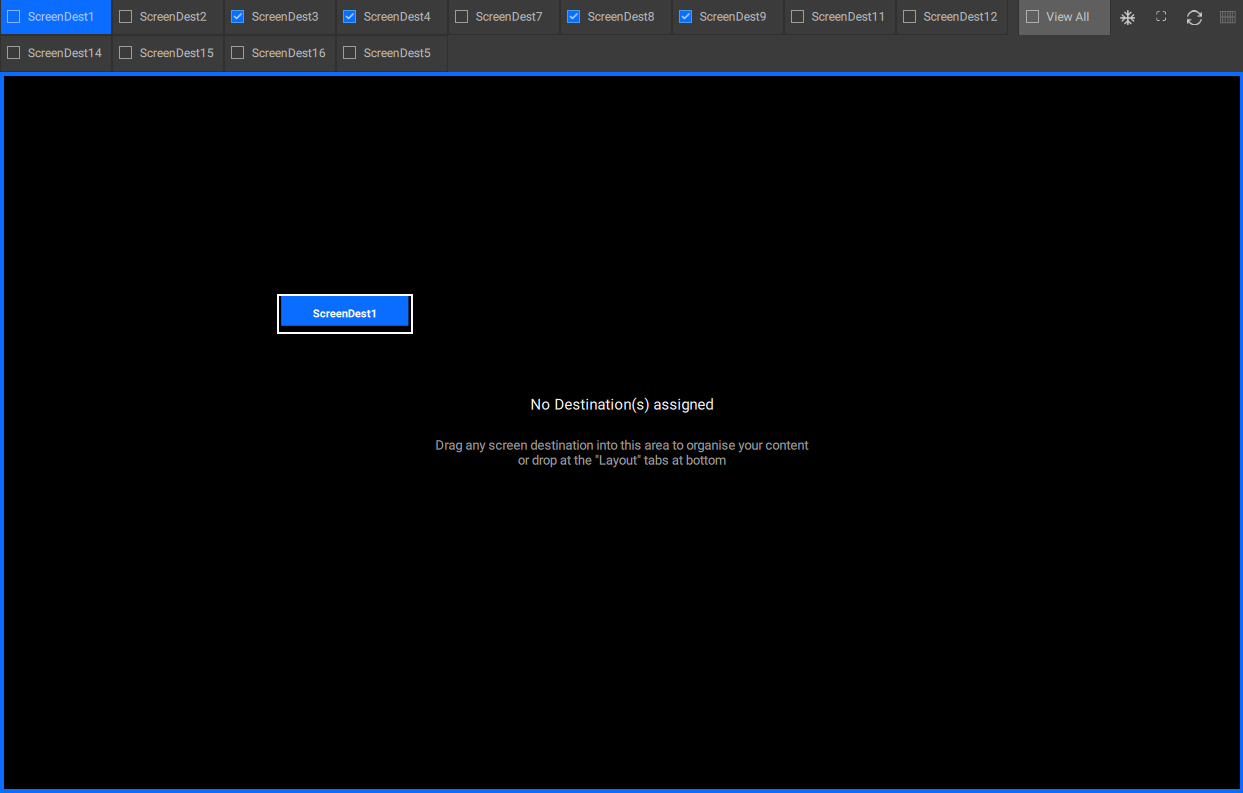
  3. Drag and drop the other desired destinations in the layout one by one, by using the following methods:

    • Drop the destination on the layout entry in the bottom panel to append the destination on the right.
    • Drop the destination on the right side of the central work area to append the destination on the right.
    • Drop the destination on the left side of the central work area to append the destination on the left.
    • Drop the destination in between two other destinations in the central work area to put it between them.
  4. Adjust the size of each destination by clicking and dragging the line in between two destinations. (optional)

    Note: To go back to the default size, click the reset icon () in the top panel.
  5. Adjust the size of each preview or program by clicking and dragging the line in between the PROGRAM section and the PREVIEW section. (optional)

    Note: To go back to the default size, click the reset icon () in the top panel.
  6. Double click on the name to enter a name for the layout.

    Tip: Provide clear names that reflect the intended purpose.
    Image 7–99
  7. Click the save icon () in the header.