6.6.2 LAN settings

SCEP
Simple Certificate Enrollment Protocol is a protocol that simplifies the requesting and issuing of digital network certificates for network equipment. Mainly used in bigger organisations where a large number of network equipment must be managed. To use SCEP, ClickShare requires the SCEP server address, the SCEP challenge and a name for ClickShare to identify itself on the SCEP server. This information is obtained from the local IT department.
NDES
Network Device Enrollment Service is a setup for a separate server that runs SCEP to manage digital network certificates for network equipment. Many implementations of SCEP use NDES. To use NDES, ClickShare requires the SCEP server address, the username and password ClickShare must use to log into the NDES server and a name for ClickShare to identify itself on the SCEP server. This information is obtained from the local IT department.
About LAN settings

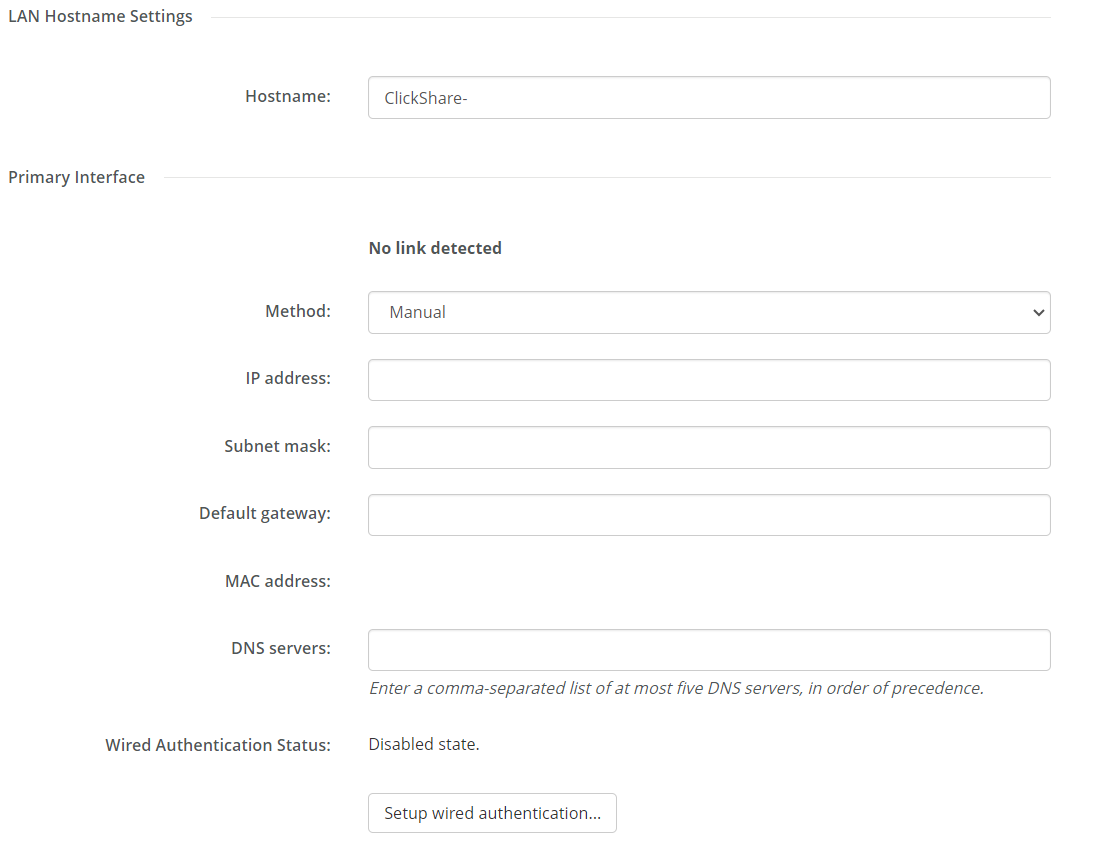
The LAN settings show the state of the current LAN connection. When the LAN is connected, most fields will be filled out automatically. When the LAN is disconnected a notice “No link detected” will be shown at the top of the “Primary Interface”.

A name can be given to the Base Unit in the input field after “Hostname”.

Image 6–40 Example of the LAN settings
How to configure the LAN settings
  1. Decide how the Base Unit must acquire its IP address, by selecting an option from the drop-down after “Method”.

    • Automatic (DHCP), IP configuration will be handled by the network.
    • Manual, input fields below the “Method” drop-down list will be enabled to allow for manual IP address configuration.
    Note: For more information about how to manually configure the IP address, contact the local IT responsible of the network.
    Tip: A static IP address is preferred. The IP address of the Base Unit is the fallback for Button(s) that cannot find the Base Unit through other methods.
  2. Decide whether the wired connection must be authenticated by a log-in server:

    • If no, go to step 7
    • If yes, go to next step
  3. Click on the button “Setup wired authentication...”.

    Image 6–41 Example of the wired authentication wizard pop-up

    A pop-up of the ClickShare wired authentication wizard will be shown.

  4. Select the applicable authentication mode from the drop-down box after “Authentication Mode”.

    • No authentication.
    • PEAP, allowing for either the EAP-TLS and EAP-TTLS methods of authentication depending on the setup.
    • EAP-TTLS, using a log-in server where the server issues certificates to the client via user authentication with password credentials.
    • EAP-TLS, using a log-in server where both client and server require a certificate. The certificates can be provided to ClickShare by SCEP, NDES or manual upload.
    Tip: SCEP requires the SCEP server address, the SCEP challenge and a name for the Base Unit to identify itself on the SCEP server.

    NDES requires the SCEP server address, the username and password Base Unit must use to log into the NDES server and a name for Base Unit to identify itself on the SCEP server.

    Depending on which authentication was chosen, different input fields and/or drop-down list’s will be shown.

  5. Fill out the required network detail fields to authenticate the Base Unit as a client of the host network.

    Note: For information about how to fill in these fields or what to select for the drop-down lists, contact the local IT responsible of the network.
  6. Click the check mark at the bottom right after “Save configuration” to apply the changes

    The chosen method will be displayed after “Wired Authentication Status”.

  7. Decide whether a proxy server will be used:

    • If no, go to step 9
    • If yes, check the checkbox in front of “Use a proxy server” and go to next step
  8. Fill out the applicable details of the proxy server that must be used in the fields that appeared below the “Use a proxy server” checkbox.

    Note: For more information about how to connect to the proxy server, contact the local IT responsible of the network.
  9. Click “Save changes” at the top of the page to commit the changes to the Base Unit!