About display connections
There are two ways to connect a display to the Base Unit:
- HDMI
USB-C
- Using a USB-C cable.
- Using a USB-C to HDMI adapter.
There are two ways to connect a display to the Base Unit:
USB-C
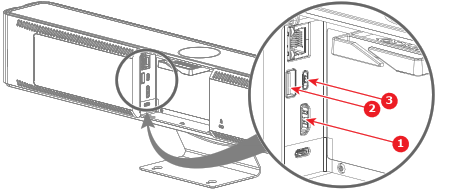
Two displays can be connected to the Base Unit at the same time. One must be connected using an HDMI connection, the other with a USB-C connection.
ClickShare supports touch functionality if the touch display is connected using USB-C and that connection is configured as position “1”in the configurator. For more information, see “Touch screen”.
Follow both procedures to connect both displays.
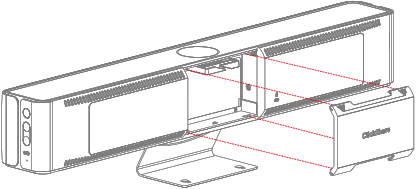
Remove the cable cover at the back of the Base Unit.
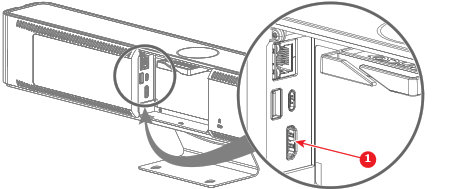
Connect an “HDMI” cable from the “HDMI” port of the Base Unit to the “HDMI in” port of the display. (reference 1)
For CB Core:
For CB Pro:
When the display is correctly configured, the ClickShare setup splash screen will be displayed on the monitor.
Is the display a touch screen? (only supported by CB Pro in a single display setup)
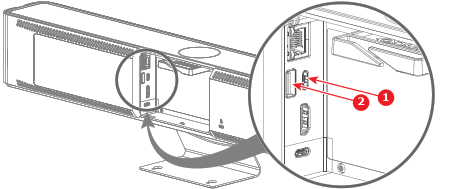
Remove the cable cover at the back of the Base Unit.
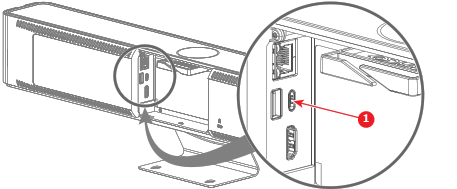
Connect a display to the “USB-C” port at the back of the Base Unit with a “USB-C” cable or “USB-C to HDMI” adapter. (reference 1)
For CB Core:
For CB Pro:
When the display is correctly configured, the ClickShare setup splash screen will be displayed on the monitor.
Is the display a touch screen? (only supported by CB Pro)