How to install
- Verify if the projector is switched off or that the projector shutter is activated (shutter is activated when the shutter icon on the projector keypad is red).
If present, remove the dust cover from the lens holder.

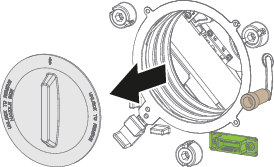
Image 4–5 Place the lens holder in the “unlocked” position as follows:. Do this by pulling the lens lock handle (reference 1) outward and then towards the electrical socket (reference 2) as illustrated.
- Pull the primary lens lock handle (reference 1) outward and then towards the electrical socket (reference 2).
- Pull the secondary lens lock (reference 3) slightly outwards until you hear an audible clicking sound.
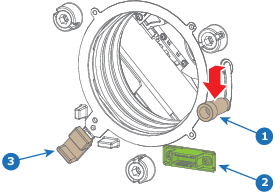
Image 4–6 Lens installation, preparation Take the lens assembly out of its packing material and remove both lens caps from the lens.

Gently insert the projection lens in the lens holder while aligning the lens connector with the electrical socket (reference 2) until a click is heard.
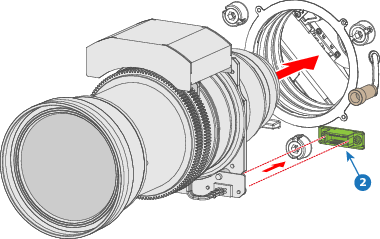
Image 4–7 Lens installation Secure the lens by sliding the primary lens lock handle to the “locked” position. Ensure the lens touches the front plate of the lens holder.
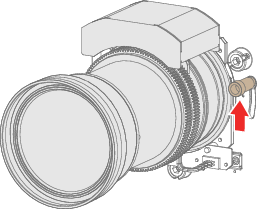
Image 4–8 Lock lens - Check if the lens is secured by trying to pull the lens out of the lens holder.