When to use the lens safety cable
The lens safety cable must be used in any circumstance where the projector is mounted above people. Do this to secure the mounted lens in the lens holder.
The lens safety cable must be used in any circumstance where the projector is mounted above people. Do this to secure the mounted lens in the lens holder.

Paste four cable clips on the lens body between motor block and lens flange as illustrated (reference 1). Orient the open side of the clips towards the front of the lens.
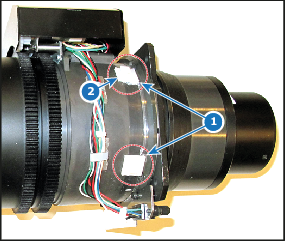
Snap the first loop end of the safety cable into one of the following clips and let the loop end point downwards.
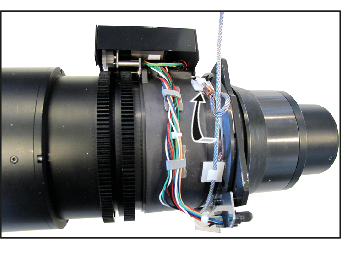
Slide the rest of the cable around the lens counterclockwise. Click the cable into every clip it passes in this loop.
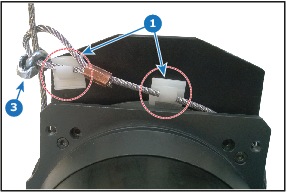
Slide the cable through the loop end at the beginning of the cable to create a lasso..
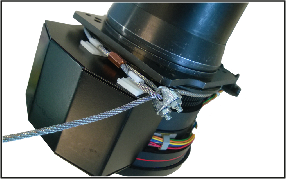
Pull the lasso tight around the lens body and install the U-bolt on the lens holder, with the open ends oriented outwards (reference 3). Make sure that both a part of the loop end and the outgoing part of the safety cable are placed in the enclosure.
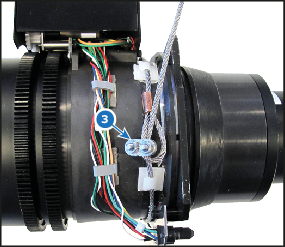
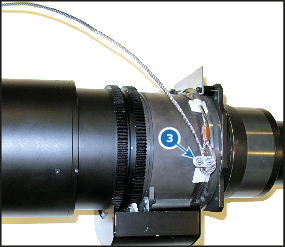
Close the U-bolt and tighten it.
Connect the shackle on the truss or rigging frame.
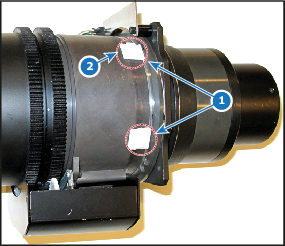
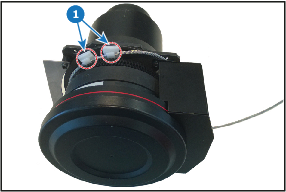
Paste two cable clips on both sides of the lens as illustrated (reference 1). Orient the open side of the clips towards the outside of the lens.
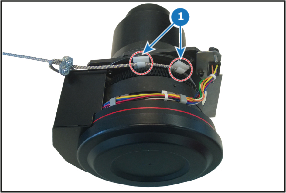
Paste two extra cable clips on the motor block of the lens. Orient the open side to the outside of the lens.
Close the U-bolt and tighten it.
The result should look similar to the following example.
Snap the shackle to the straight part of the cable.
Secure the shackle by screwing the safety ring of the shackle over the open end.
[5] Only four pieces are needed to assemble the safety cable to a lens. When the safety cable is used on another lens, you should not remove the cable clips. Instead, use four new ones. There are enough cable clips in the kit to secure up to five different lenses.