Adding Base Units to XMS Cloud can be done using one of three methods:
Using the device token. This is the method for C and CX series Base Unit devices.
Using XMS Edge. This is the method for CSE series Base Unit devices..
Migration from XMS Edge: This restores the database from a previously running XMS Edge.
How to add C or CX series Base Units using device token
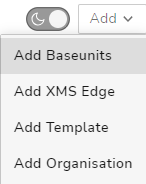
Click on the add drop-down list and select add Base Units.
Image 2–4
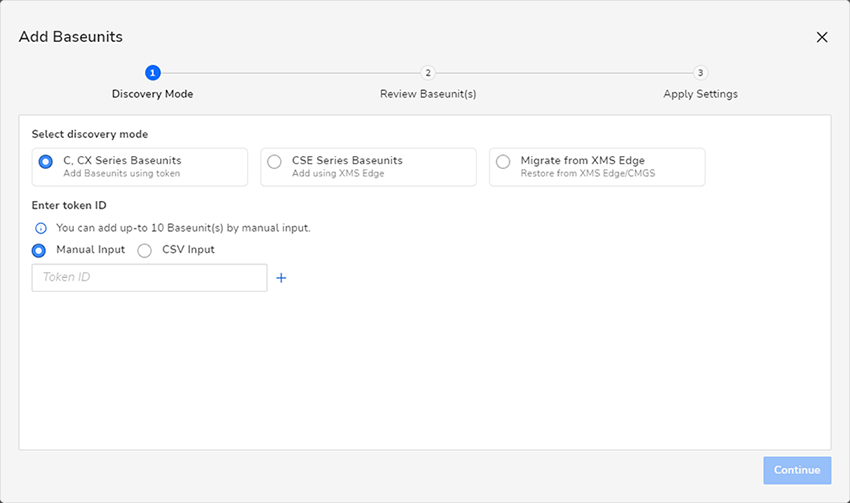
The add Base Unit window is displayed.
Image 2–5
If not already selected, under Select discovery mode select the first option: Add Base Unit using token.
Select the radio button of the desired input method:
Manual input: Fill in each Token ID manually, one at a time. This is the preferred method if the amount of devices to add is minimal (up to 10).
CSV Input: Upload a .csv file (comma separated file) with the list of tokens of all devices you want to add. This is the preferred method if you have many units (>10) to add at the same time.
If you are using CSV Input, use the Upload file field to navigate to and select the desired CSV file on your computer.
Image 2–6Upload location for .csv files
If you are using Manual Input, fill out the Token ID field with the XMS Token ID from your Base Unit device.
Tip: To obtain the Token ID, log into the Configurator of your Base Unit device. Browse to System >> XMS. You will find the token in the XMS Cloud pane.
For more info on how to access the Configurator of your device, please refer the installation manual of your device.
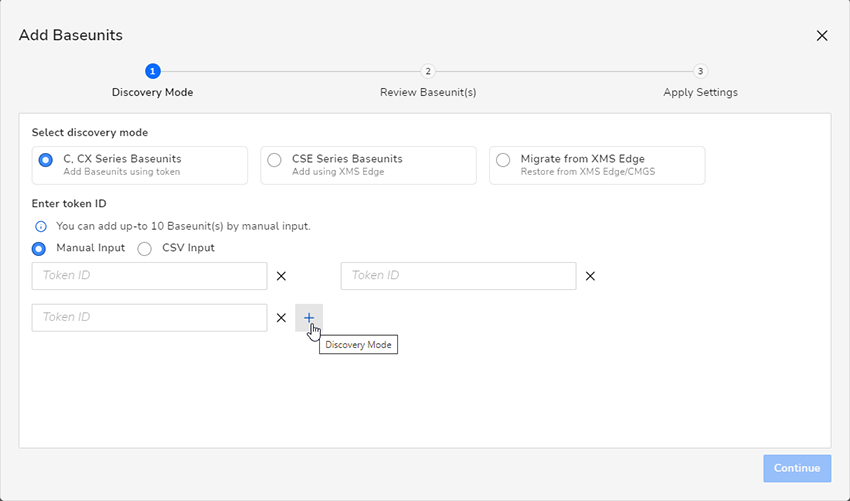
To add an extra device, click on the “+” button and repeat the previous step.
Image 2–7Example adding Base Units
Tip: To delete a Token ID field, click on the “X” button, next to the input field.
Once all desired devices are filled in, click Continue.
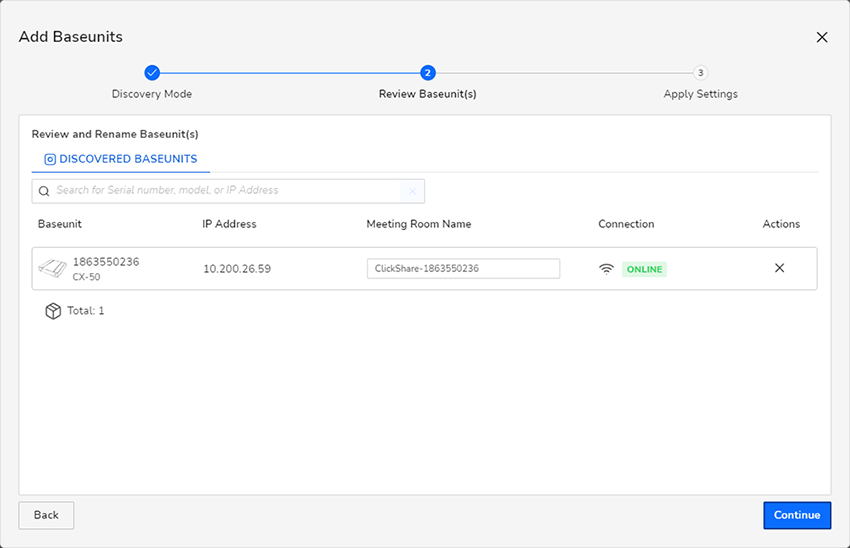
The Review Base Unit(s) page is displayed.
Image 2–8Example of the Review Base Unit(s) page
If desired, you can change the Meeting Room Name field (optional).
Note: You can also skip this step and change the name afterwards.
Click Continue.
The Apply Settings page is displayed.
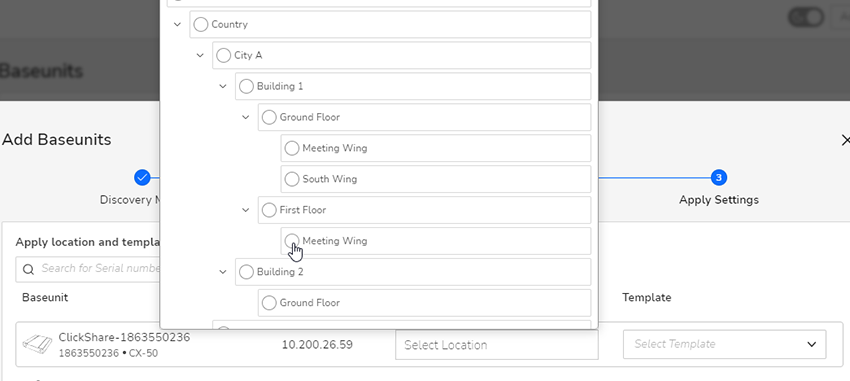
Image 2–9Example meeting room location
On the Apply Settings page, you can select the location where the Base Unit device is located. Clicking on Select Location will open a location selector, using the locations of the current organisation.
Click Register.
All listed devices are registered in the system and added to the list of Base Unit devices.
How to add CSE series Base Units using XMS Edge
Click on the add drop-down list and select add Base Units.
Image 2–10
The add Base Units window is displayed.
Image 2–11
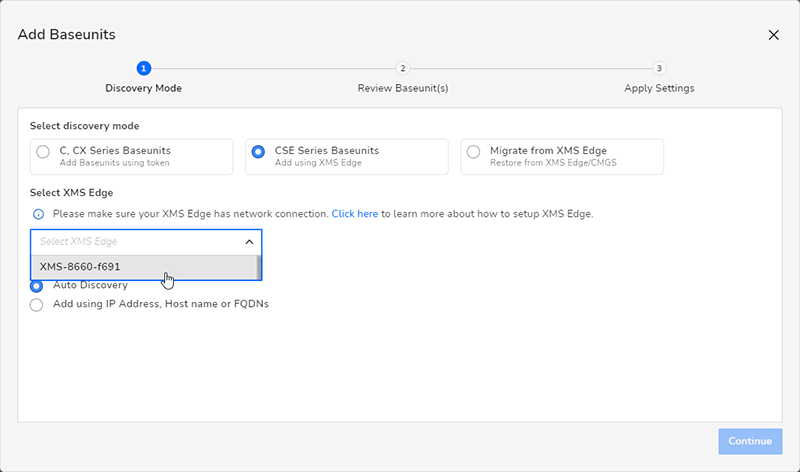
Select the radio button in front of CSE Series Base Unit devices.
The window will change its options to XMS Edge related options.
Use the drop-down list to select the desired XMS Edge to search for Base Unit devices.
Image 2–12Selection of XMS Edge
Select how to discover the Base Units.
The following selections are possible:
Auto Discovery: Edge will auto discover Base Units.
Add using IP address: Manually enter use the IP addresses, hostname or FQDN of Base Unit devices in the same subnet.
Note: Use commas to separate the IP addresses, hostnames or the FQDN’s of the Base Units in the input field.
Click Continue.
The Base Units discovery and registration process start automatically. Please wait until the process is completed.
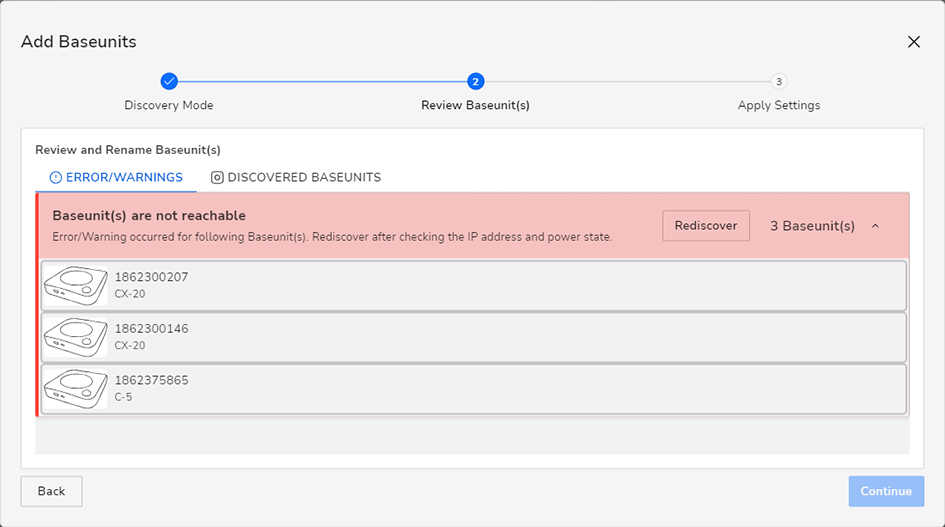
Once completed, the discovered units will be listed in two ways:
A list of Base Unit devices with “errors/warnings”. These are devices that cannot be added to XMS Cloud or cannot be reached.
A list of “Discovered Base Unit devices” that will be added to XMS Cloud once completed.
Image 2–13Example of Base Unit devices that cannot be reached.
In case of Base Unit devices that cannot be reached, resolve the connectivity issues (power, network or other issues) and click Rediscover to add them to the list of discovered devices.
Click Continue.
The Apply Settings window is displayed.
On the Apply Settings page, you can select the location where the Base Unit devices will be located. Clicking on Select Location will open a location selector, using the locations of the current organisation.
Image 2–14
Click Register.
All listed devices are registered in the system and added to the list of Base Unit devices.
How to migrate Base Units from XMS Edge
CX- and C- series based devices stored in XMS Edge can be migrated to XMS Cloud. This process is done in 2 sub-processes:
Preparing XMS Edge for devices migration.
Configuring migrated devices into XMS Cloud.
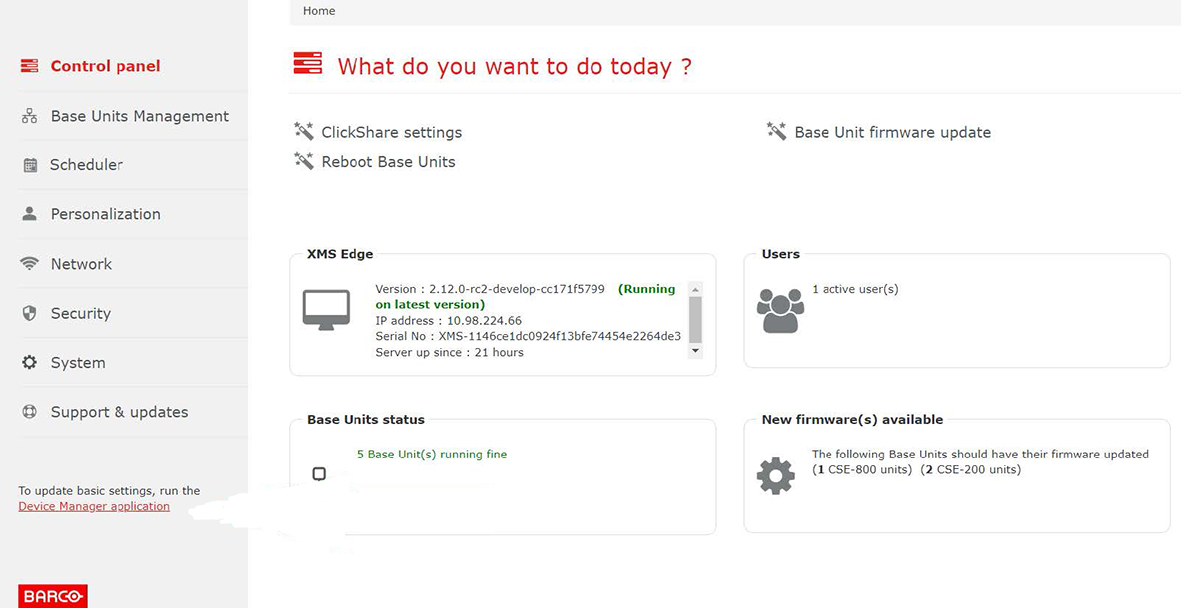
Preparing XMS Edge for Base Units migration.
Within XMS Edge, click the Device Manager application on the bottom left.
Image 2–15
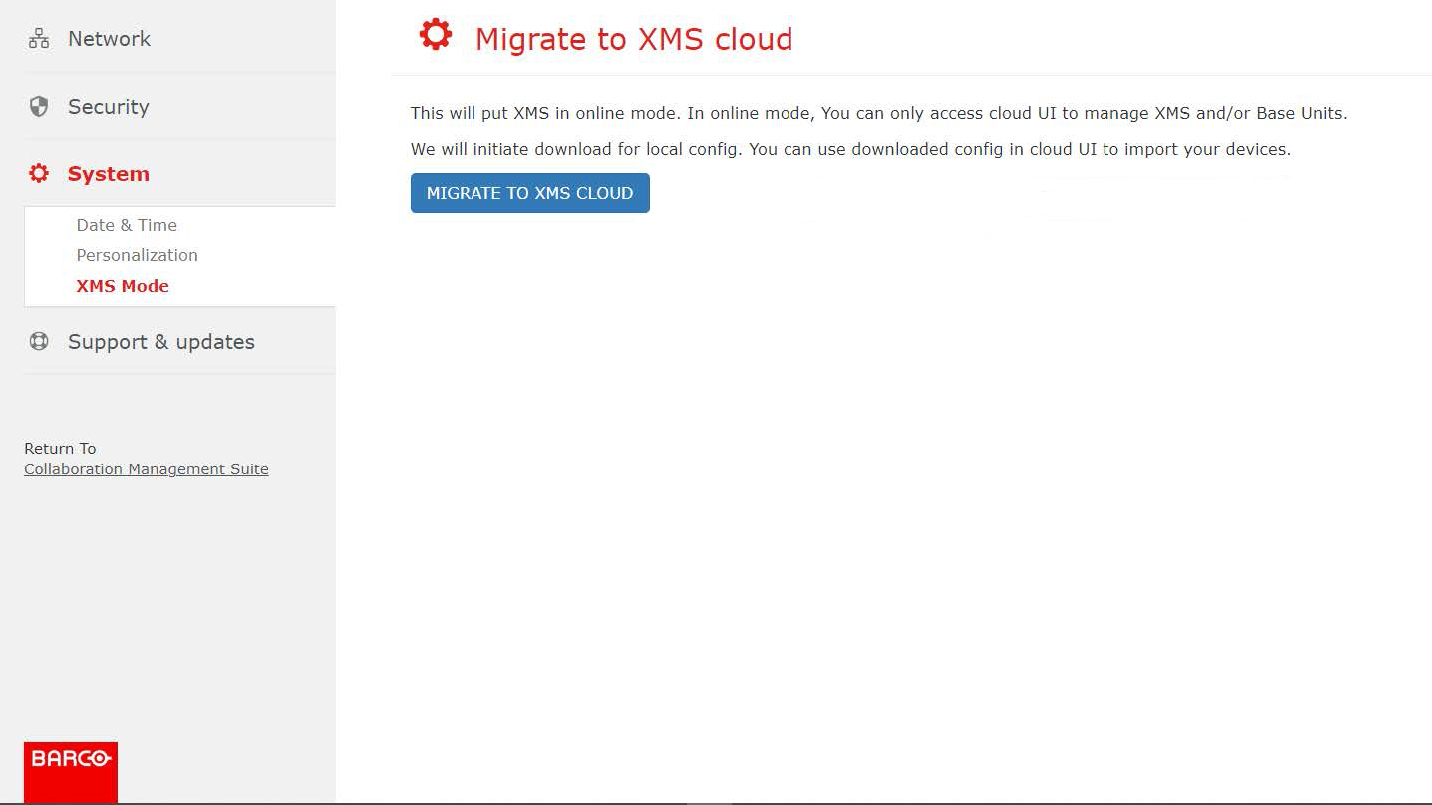
Click System >>XMS Mode.
Image 2–16
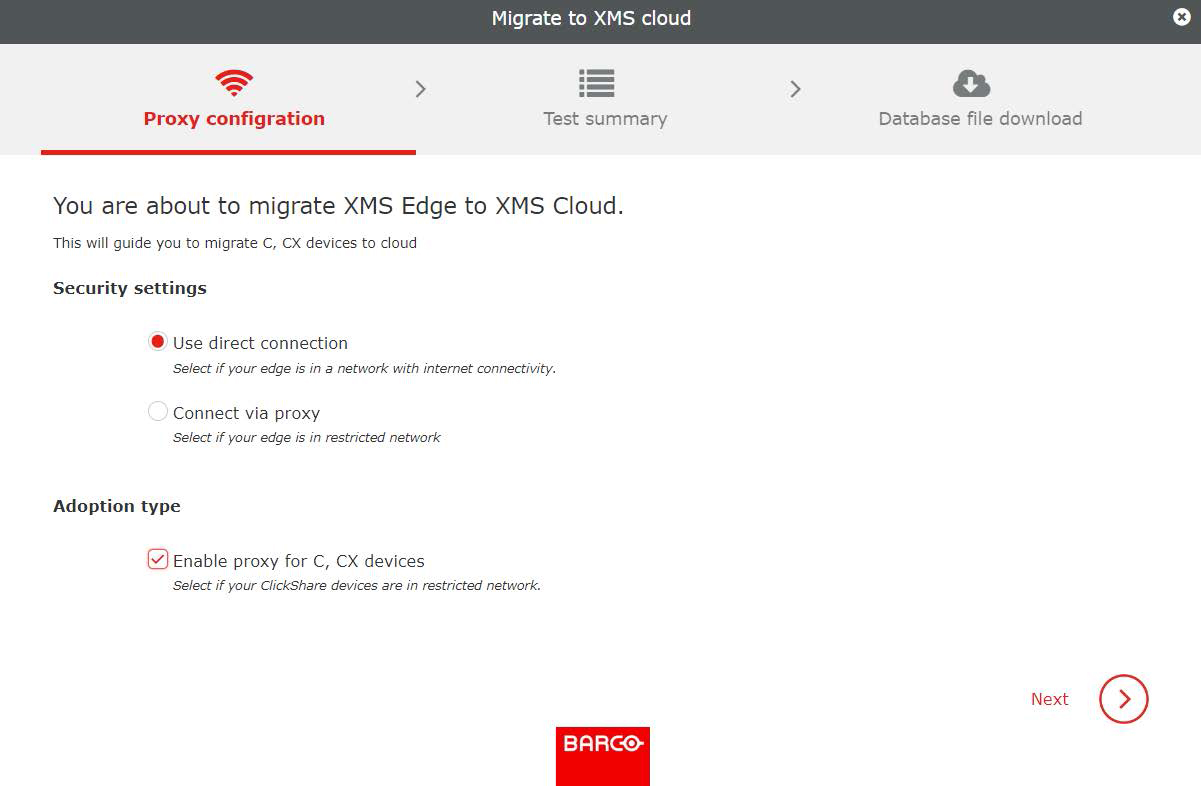
Click MIGRATE TO XMS Cloud.
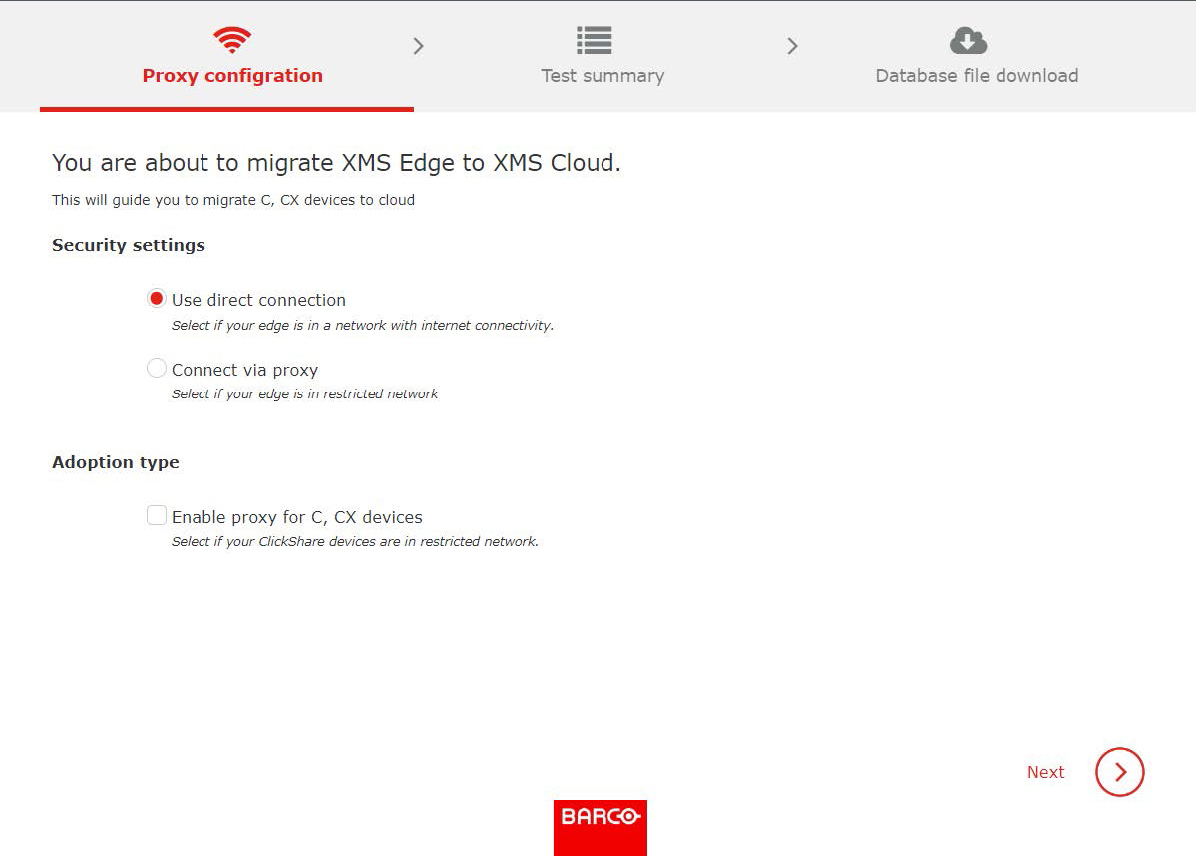
Choose your connection configuration in the wizard and click Next.
Scenarios
Description
Recommended configuration
XMS Edge and Base Units on a non-DMZ network
XMS Edge and Base Units on the network with internet connectivity.
Select Direct Connection
Deselect Enable proxy for C/CX
XMS Edge on a non-DMZ network and Base Units on a DMZ network
XMS Edge on the network with internet connectivity.
Base Units on the network with no internet connectivity.
Select Direct Connection
Select Enable proxy for C/CX
XMS Edge on a DMZ network and Base Units on a non-DMZ network
XMS Edge on the network with no internet connectivity.
Base Units on the network with internet connectivity.
Select Connection via Proxy
Deselect Enable proxy for C/CX
XMS Edge and Base Units on a DMZ network
XMS Edge and Base Units on the network with no internet connectivity.
Select Connection via Proxy
Deselect Enable proxy for C/CX
Choose your connection configuration in the wizard and click Next.
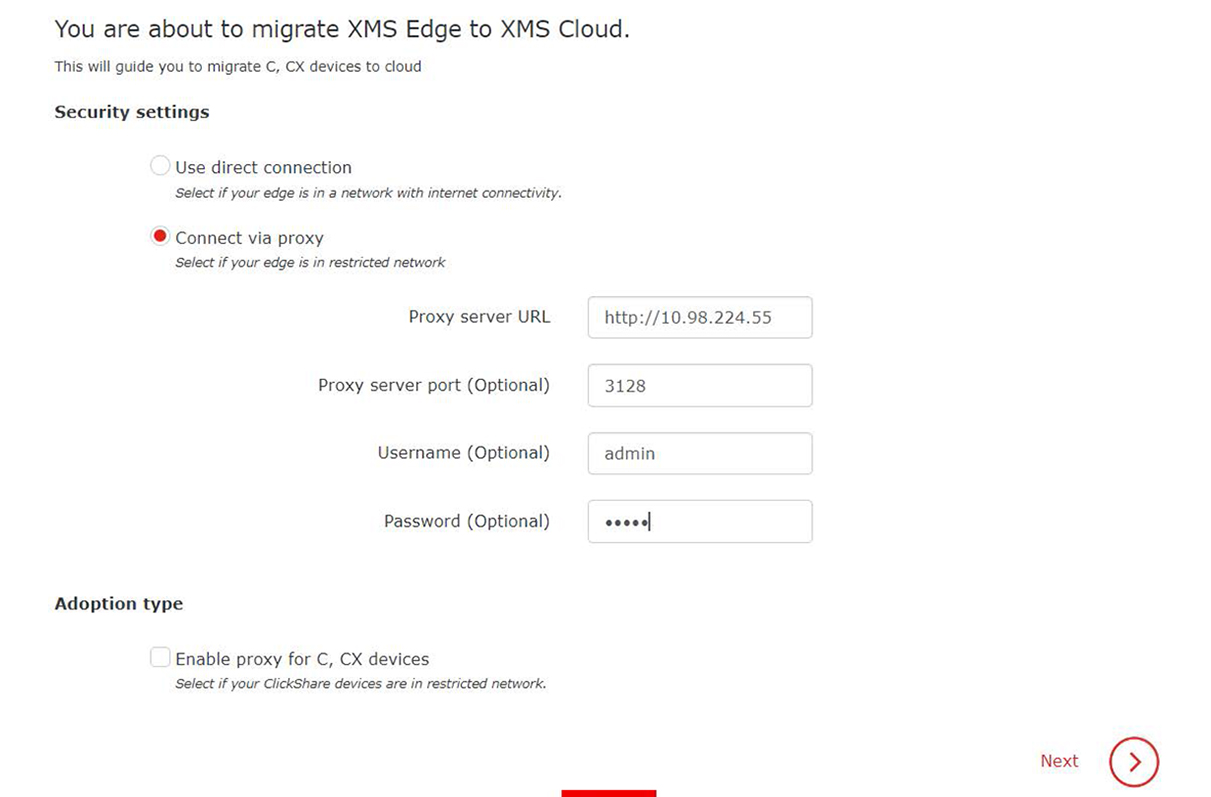
Image 2–17Direct connection for XMS Edge and ClickShare Base Unit devices.Image 2–18Proxy connection for XMS Edge and direct connection for ClickShare Base Unit devices.
Proxy connection for XMS Edge and direct connection for ClickShare Base Units.
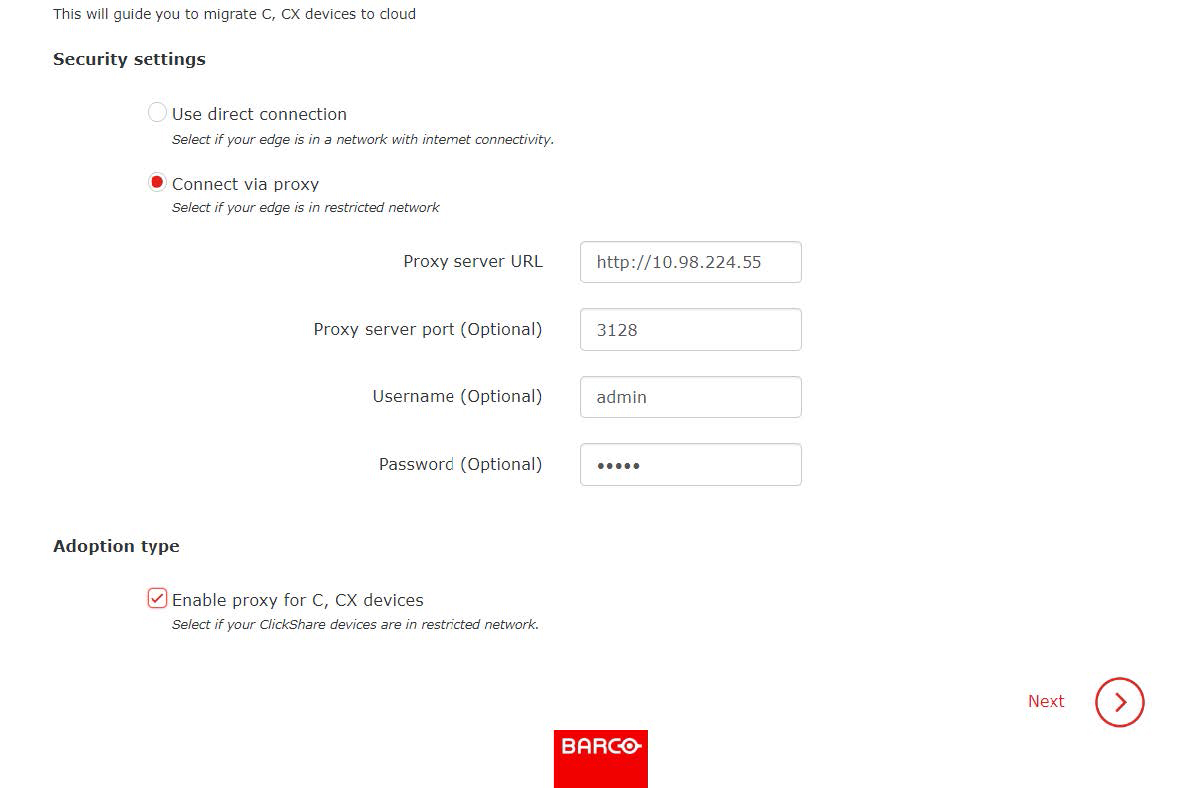
Proxy connection for XMS Edge and ClickShare Base Unit devices.
Image 2–19
Direct connection for XMS Edge and Proxy connection for ClickShare Base Units.
Image 2–20
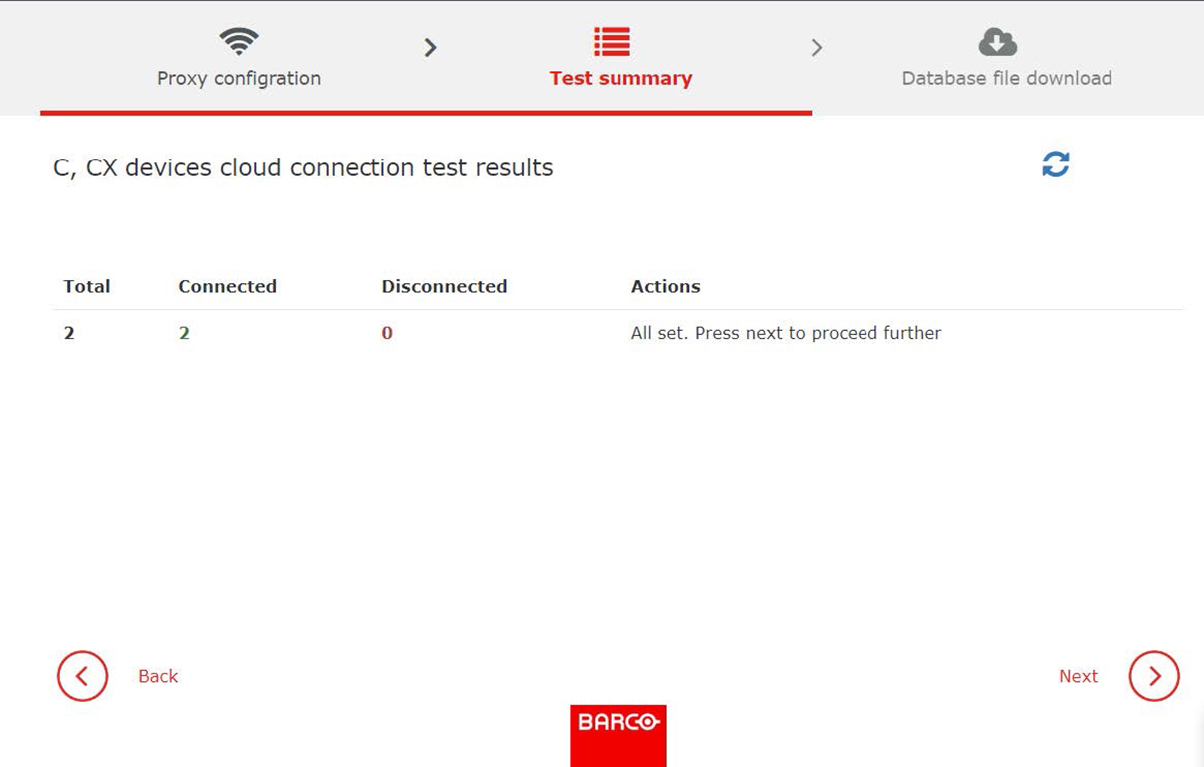
The total number of Base Units discovered for migration will be shown under the “Connected column” in the “Test summary” tab.
Image 2–21
Note: Undiscovered Base Units will be shown under the Disconnected column, download the CSV file next to it for analyzing the undiscovered Base Units. [Optional] After making the necessary correction, click the refresh icon within the Test summary tab to fetch the corrected Base Units.
Click Next.
The database configuration file will be downloaded to your local machine and then you will be redirected to the XMS Cloud.
Configuring migrated Base Units in XMS Cloud
Click on the Add drop-down list and select Add Base Unit.
Image 2–22
The Add Base Unit window is displayed.
Image 2–23
Select Migrate from XMS Edge.
Select the desired XMS Edge space.
Note: Make sure at least XMS Edge is available.
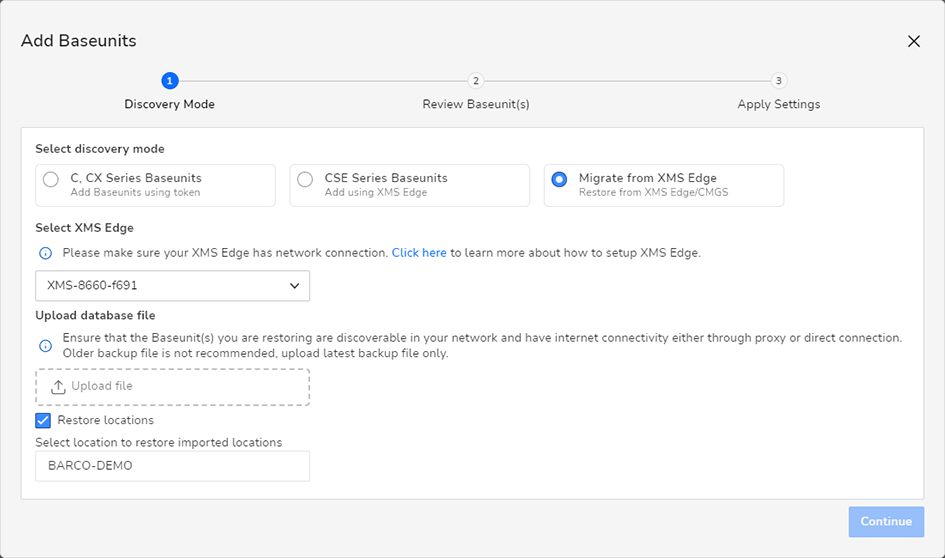
The detail window will adapt accordingly.
Image 2–24
Select your XMS Edge from the drop-down list.
Click Upload file to upload the previous downloaded file.
Alternatively, you can also drag and drop the downloaded file into the Upload file field.
Select restore locations to immediately import the units to a specific location in the current space.
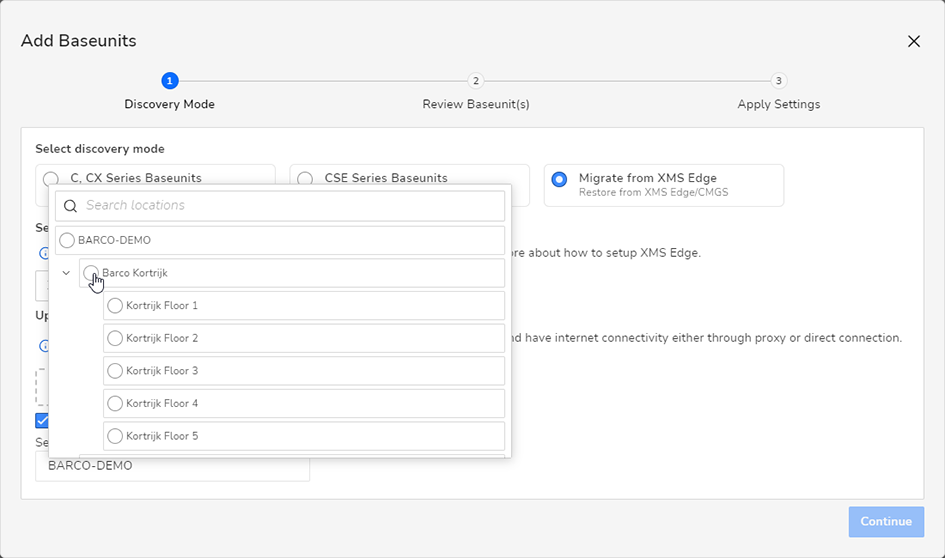
If selected, a field picker option will become available at the bottom of the window. Click on it to choose the desired location.
Image 2–25Example of the location picker
Click Continue.
The Base Units discovery and registration process start automatically. Please wait until the process is completed.
Once completed, the discovered units will be listed in two ways:
A list of Base Unit devices with “errors/warnings”. These are devices that cannot be added to XMS Cloud or cannot be reached.
A list of “Discovered Base Unit devices” that will be added to XMS Cloud once completed.
Image 2–26Example of Base Unit devices that cannot be reached.
In case of Base Unit devices that cannot be reached, resolve the connectivity issues (power, network or other issues) and click Rediscover to add them to the list of discovered devices.
Click Continue.
The Apply Settings window is displayed.
On the Apply Settings page, you can select the location where the Base Unit devices will be located. Clicking on Select Location will open a location selector, using the locations of the current Organisation.
Image 2–27
Click Register.
All listed devices are registered in the system and added to the list of Base Unit devices.