How to mount
- Turn the projector on its side or on its top cover.
Place the bottom support plate on the bottom plate of the projector. Make sure that the fixation holes match the holes in the bottom plate.
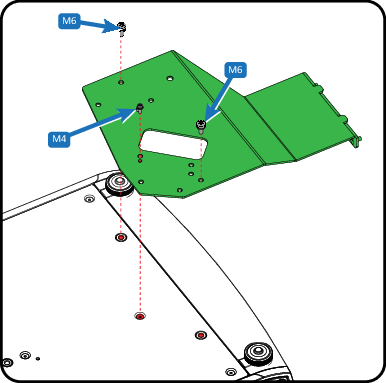
Image 5–18 Mount the bottom plate - Turn in both M6 screws and the M4 screw.
Turn the projector back on its feet.
Slide the lens locking system to the left.
Insert the lens. Make sure the electric contact points (C) on the lens match the contact points on the lens holder.
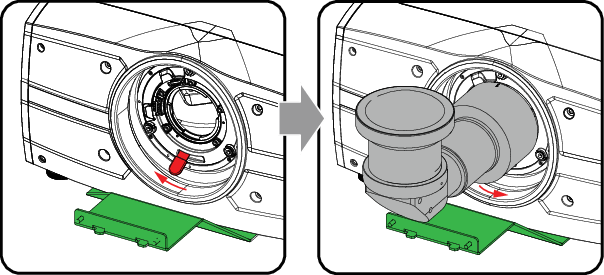
Image 5–19 Mount the lens 
Image 5–20 - When the lens is on its place, close the lens locking system by moving the handle from the left to the right.
Project an image and adjust the shift. See projector’s user manual for more information about lens shift.

Slide plate 2 on both threaded rods and turn a nut on each rod. Do not fasten yet! It must be possible to move the plate a little bit while mounting the other plates.
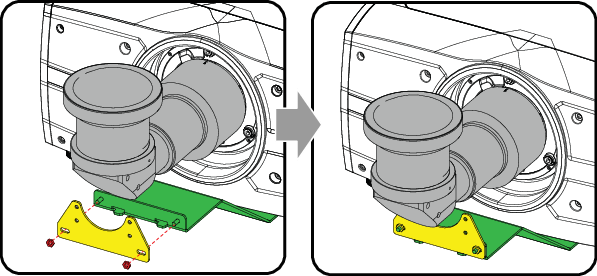
Image 5–21 Mount the 2nd plate Mount the 3th plate on the 2nd plate. Use the upper mounting holes in the 2nd plate.
Drive in both screws but do not fasten yet.

Image 5–22 Mount the 3th plate Place the clamping bracket on the lens so that the fixation holes matches the holes in the support.
Drive in both fixation screws. If necessary, move the 3th plate a little bit until it fully match with the lens.
Fully secure both screws.
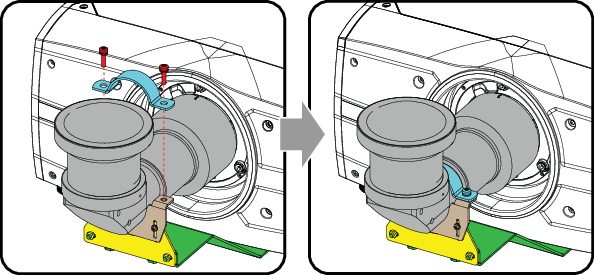
Image 5–23 Mount clamp bracket Fully fasten the screws of the 3th plate and the nuts of the 2nd plate so that the support is fully assembled.
The projector is ready for use.