E.3 Maintain white point dimming

General

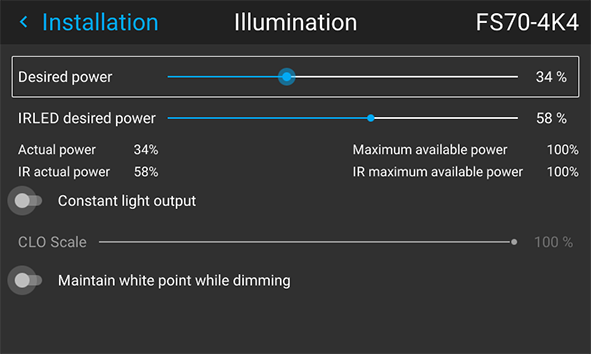
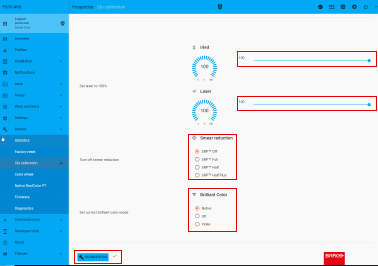
Maintain white point while dimming (MWPWD) is a feature used to keep the white point stable while dimming.

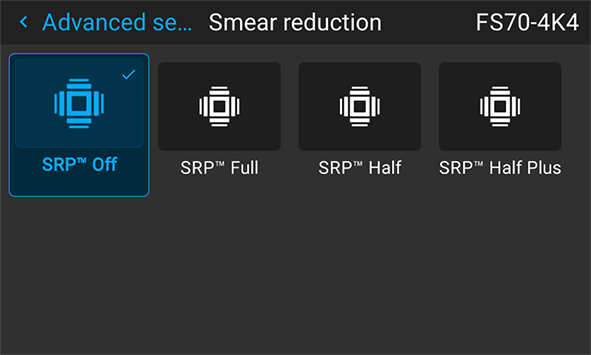
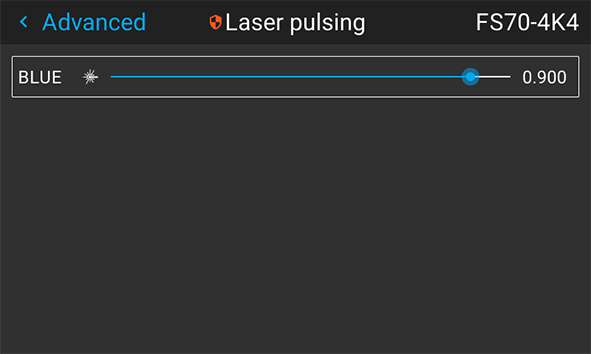
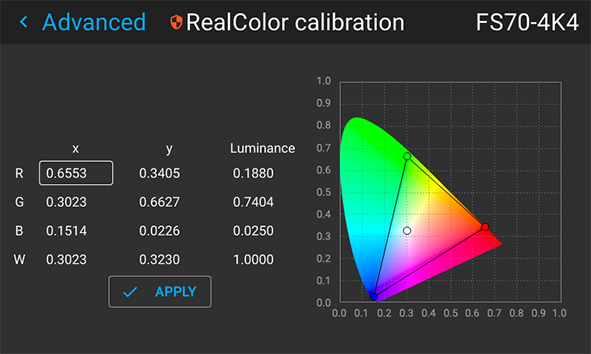
MWPWD requires a correctly calibrated laser pulse value for the desired white point. If the laser pulse value is changed to obtain this white point, a recalibration of the light sensor is also required. MWPWD works with Brilliant Color (BC) mode Native and Smear Reduction Processing (SRP™). The calibration of the light sensor must however be done with BC Native and SRP™ Off

Maintain white point while dimming
  1. Enter the menu Installation -> Illumination

    Image E–9
  2. Enable the button “Maintain white point while dimming” to enable and disable. Dimming the projector is still done by adjusting the laser power, please allow up to 3 minutes for the white point to stabilize when changing the laser power.
  3. Use the fine tuning option in Prospector to adjust the white point even more accurately. Fine tuning can also be done with RealColor.

    Image E–10
Calibration for Maintain white point while dimming
  1. Allow unit to run for at least 15 minutes to enable stable light output.
  2. MWPWD must be turned off during the calibration
  3. Select RealColor mode preset: Native. Menu -> Image -> Advanced settings -> Realcolor P7

    Image E–11
  4. Select desired BrilliantColor mode Native. Menu -> Image -> Advanced settings -> BrilliantColor

    Image E–12
  5. Select desired Smear reduction mode SRP™ Off. Menu -> Image -> Advanced settings -> Smear reduction

    Image E–13
  6. Set Desired power and IRLED desired power to 100%. Installation -> Illumination

    Image E–14
  7. Use a white test image either from an external source or the internal White test pattern. A chromameter is needed to measure the coordinates of the white test pattern.
  8. Adjust the laser pulse value to obtain the desired white y-coordinate.

    1. Log in as Power user. Go to menu Menu -> Settings -> Maintenance -> Advanced

      Image E–15
    2. Enter the access code from the remote controller numeric pad to have access to the feature.

      Image E–16
    3. Enter the menu to adjust the laser pulsing value.Maintenance -> Advanced -> Laser pulsing

      Image E–17
      Image E–18
  9. Go to Native RealColor within the Maintenance section to input the resulting white x and y coordinates. Click Apply when done.

    Image E–19
  10. Calibrating the CLO is only possible through Prospector, enter Prospector by entering the IP address of the projector followed by port 9999 in a web browser, e.g. 192.168.1.100:9999
  11. Log in to Prospector as Power user.
  12. Go to Service -> CLO calibration
  13. Click the “Calibrate CLO” button

    Image E–20
Note: If other settings than SRP Off is desired, these settings can now be applied.

The white point can be fine-tuned through the fine tuning feature of MWPWD in Prospector underSettings -> Illumination or through RealColor if desired

Image E–21