When to use the lens safety clamp
The projection lens must be secured with a safety cable in any circumstance where the projector is mounted above people.
The projection lens must be secured with a safety cable in any circumstance where the projector is mounted above people.
The lens safety clamp kit R9803511 is suitable for all “standard” FLD lenses except the UST 0.28 (R9802232) and UST 0.38 (R9801832) where the body geometry is different. For these UST lenses the lens safety cable kit R9801196 must be used.
Content of the lens safety clamp kit:
Torque wrench with Torx T20 bit.
Assemble the safety clamp around the lens body as follows:
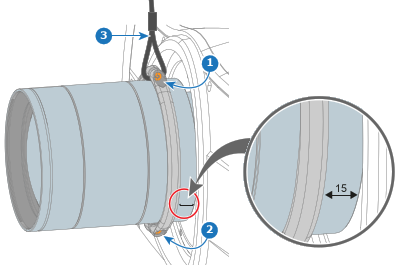
Attach the other end of the safety cable with the projector body, rigging frame, truss installation, or ceiling. Use the shackle to close loop.